Pages

Friday, December 28, 2012

Oreo Peanut Butter Cups


Are you in your post holiday sweets aversion phase?  Does the very sight of Christmas cookies and goodies make you a bit nauseous?  Yeah me too, but I couldn't not post these little guys.  File it away mentally for next Christmas maybe or pick up some Valentine's muffin cups and make these sweets for your sweet in February.  If you love PB and chocolate, definitely make them sometime. 


The recipe itself is not innovative or ground breaking--it's pretty similar to buckeyes but with some graham cracker crumbs thrown in.  The crumbs add some pretty awesome texture.   

It's the Oreos that take these over the top.  Do you feel like a cookie or candy?  No need to decide. 


If you want to make these without the Oreos you just pat them into the muffin tins and then you'll top with chocolate.

I say O-R-E-O makes everything better.  Yes, I have a not-so-secret love affair with Oreos.  I keep the family pack in the house for my family of one.  If you ask I'll tell you it's because they package them in 5 stay fresh packages that last longer.  If you press me I'll admit it's because Oreos are the greatest store-bought cookie in the world.  Universe perhaps.  

Double Stuf of course.  The only thing that would heighten my love affair with Oreos would be if they were to spell "stuff" correctly.  Maybe even change it to a past tense verb.  Does Nabisco mean these cookies have double the stuff(ing) or that they've been double stuffed?  Noun? Verb? Should food really be so ambiguous?  I look the other way only because, well, they are Oreos. 


No need to press the PB filling on the bottom if using Oreos.  Just plop one small scoop in the tin and press your Oreo in pretty firmly.  The PB filling should ooze up and around the Oreo to fill in all the crevices. 


Drop another scoop of PB filling on top and press all around the Oreo and then smooth out the top. 


Top with melted chocolate and refrigerate until firm.  I think these are so much better eaten cold-they get a little mushy at room temp. 


Without the Oreo.  Tolerable, but not handsome enough to tempt me. 


Oreo Peanut Butter Cups

Ingredients:
1 1/2 cups melted butter
2 cups graham cracker crumbs(about 1/2 box or 2 sleeves)
1 2/3 cup peanut butter
2 cups powdered sugar
Oreos

Chocolate Topping
2 cups chocolate chips
1/2 cup peanut butter chips

Directions:
  1. Line muffin tins with cupcake liners.  This recipe will make 15-20 depending upon thickness, whether you use regular Oreos, double STUFFED Oreos or no Oreos)
  2. Combine graham cracker crumbs, peanut butter and powdered sugar in larger bowl.  Pour melted butter over and stir until well mixed.
  3. Drop one teaspoon into each cupcake liner.  Place an Oreo on top and press down.  Top with another scoop of peanut butter filling and press down well around the edges to fully wrap filling around the Oreo.  Smooth out top.
  4. Combine chocolate and pb chips in a medium glass bowl. 
  5. Melt in the microwave for 30 seconds. Remove from the microwave and stir.  Microwave for additional 30 seconds, stirring once midway through.  Stir until smooth and spread on top of the peanut butter cups
  6. Refrigerate cups until firm

Wednesday, December 26, 2012

Christmas 2012

Hoping your Christmases were joyful and full of family, friends and blessings!!!

Christmas here was lovely I did my best to have my camera ready for all of the Peanut and Chipmunk cuteness. Just a word of caution that this will be a photo heavy post with few words.  But really, who needs words when there is so much cuteness to behold?  


My sister was in from Vegas for the holidays so we took a little family trip to Hammonds Candy Factory.  They moved their building and the new one seems much bigger (and much busier.)  It was a bit of a zoo on a Saturday right before Christmas. 


Peanut is not such a peanut anymore. Puppies are still peanuts though.


Chipmunk is not such a little one anymore either.  She was also quite a bit harder to get in front of the camera but I was able to sneak a shot here and there.


A little Dickensian don't you think?  "Please sir...."


My brother has a favorite pic of a two year old Peanut posing this way for some inexplicable reason.   Peanut wanted to recreate her Daddy's favorite pic just for him.  Love this girl. 


The almost pure darkness of my mom's living room taxed my poor camera's low light capabilities. I'm sure that if I wasn't opening up my aperture to 1.2, 1.4 and 1.6,  I would have missed almost all of these following shots--and at ISO 1600 the noise was a bit much even with Lightroom noise reduction.    Justification enough to start looking at a full frame camera?  I think...maybe so. 


Is there any other scent that can transport you back to childhood faster than Playdoh?


It was a lovely Christmas with family.  Maybe sister should consider moving back to Denver. 

Saturday, December 22, 2012

Bourbon Sea Salt Caramels


The more I make caramels, the more I am convinced that these are one of life's culinary surprises....so quick and easy to make, but packs a punch with a definite "wow" factor.  Did you catch that first part?  Yes, SO quick and easy to make.  They fall into the same category as creme brûlée--people will think you worked so much harder than you really did. 

There are however two lessons I learned along the way:

Lesson 1: Don't stir while the caramel is cooking. It seems scary and when I first started making caramels, I thought this was a suggestion.  I had a block of rock solid grainy mess within minutes of of stirring and never stirred again.  This recipe calls for cream while cooking so stirring might be okay, but the horror of that first time my candy turned instantly into a rock has place the fear of stirring in my heart forever. 

All of the ingredients in the pan will melt together and blend all on their own.  Trust me she said. 


See.  Not a spoon in site. 


Lesson 2: Learn your candy thermometer.  I used to follow caramel recipes exactly and always found my caramels to be too hard and chewy.  I started using the ice water method (drop some of the caramel in ice water to cool it down and then roll it between your fingers to gauge the firmness) with the thermometer and found that 225 degrees was the caramel sweet spot on my thermometer. Turns out altitude plays a role in caramel temps... makes sense since water boils at a lower temp at altitude.  Duh me.  I don't know the exact science, but I do find 225 to the be perfectly chewy caramel temp when I make these now.  At a mile above sea level.  


The bourbon adds a pretty subtle flavor to this. If you are not so much a bourbon fan, you can substitute a tsp of vanilla extract.  Take care when stirring the bourbon or extract in as it will spit and bubble as you stir. 


Dipping in chocolate is optional if you happen to be in the category of people that think chocolate is really a choice and not a necessity.  I dipped of course. 


These seriously take about 10 minutes of stove time, two hours to cool in the refrigerator and then just the time it takes to dip.  So easy it doesn't have to be a holiday or special occasion to whip them up. These could definitely be dangerous. 


Bourbon Sea Salt Caramels

1 2/3 sticks of butter
1/2 cup sugar
3/4 cup light brown sugar
3/4 cup light corn syrup
1/4 cup heavy cream
1 1/2 tsp sea salt
3 tsp bourbon
2 cups melted and tempered dark chocolate
sea salt for sprinkling

Directions
  1. In a heavy bottomed pot combine butter, sugars, cream and 1 1/2 tsp salt.  
  2. Bring mixture to a gentle boil over medium heat without stirring. Attach a candy thermometer to pan.
  3. Prepare an 8x8 inch pan by lining with parchment paper (wax paper will not work).  Set aside. 
  4. Continue cooking caramel mixture until caramel is 225-230 degrees and mixture is a warm golden color (about 7-10 minutes)
  5. Remove from heat and stir in the bourbon taking care as mixture will bubble and spit as you stir. Allow to cool for a couple of minutes, then pour into prepared 8×8 inch pan 
  6. Cool caramels to room temp and then refrigerate until set (about 1 hour). Cut into small squares.
  7. Dip squares into melted tempered chocolate.  Set on wax paper or parchment paper and sprinkle with sea salt.  Allow chocolate to harden before serving. 
  8. Store in refrigerator but allow to come to room temp before serving. 

Monday, December 17, 2012

Gingerbread Houses


I'm not going to pretend my gingerbread house skills are anything to write home about.  This stuff definitely requires the patience of a saint.  But throw together a group of girls, some wine and bowls of candy and it actually becomes quite a laugh fest as the houses come crumbling down.  At least a few times each. 

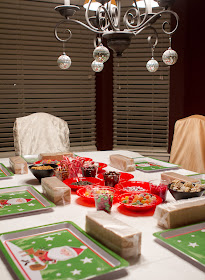
My friend Ash threw together a festive girls night of gingerbread house building and we had quite the time trying to create houses that withstood the multiple "earthquake" tests.


Who are these gingerbread house building geniuses we see in magazines and on TV?  Four attempts at graham cracker building finally resulted in a structure that didn't crumble...but oh the frosting mess.  I covered mine in pretzels because I had to. 


The church steeple that kept growing and growing. 


  This Christmas project is courtesy of Pinterest.  Leftover Christmas ball ornaments, strung on a ribbon makes a hanging ornament decoration in 5 minutes flat.  Who knew?  


Is anyone else sad to think that Christmas will be over in a week and the tree and decorations will have to come down after that?  I swear I could just sit and read by the light of the fire and tree (and okay--backlit screen of my nook) forever and ever.  And ever.