Friday, January 27, 2012

Homemade Cheese Its


You are all pretty awesome.  Seriously, I am truly amazed when I get e-mails asking if all is well or wondering why I've been missing because I'm completely humbled that you spend your personal time to head over here.  And then of course my guilt kicks in and I feel bad that I haven't been in the kitchen that much recently.  I have a good reason, yes I do.  Working on a little project right now that has kept me out of the kitchen for the moment but hoping to back in full swing soon.

In the meantime I thought I'd share this phenomenal recipe for a little snacky snacky treat.  I have to warn you though that these are crazy addictive.  I can make a cheesecake or cupcakes and let them grow all kinds of mold just sitting in my fridge but heaven help me if I make a salty snacky type food.  These are so salty, cheesy, can't stop eating them good.  I'll admit to thinking cheez-its are pretty tasty especially floating on top of a hot bowl of tomato soup but  don't buy them because they break the  "no Cheez with a "z" rule.  These homemade versions have all of the flavor and you use cheese spelled with an "s"...happiness indeed.  I kid you not, I could have eaten just these all day and night for a week.

I made them a little thick(about 2mm) because I was in the mood for a chewier topping for my soup but roll them out thinner and they crisp up cracker style.  I've made made them with both cheddar and parmesan and love them both equally.

Brooklyn would just like you know that these (without the salt topping) can and should be for dogs as well....from a dog who hates all cookies and biscuit type treats, that's saying something.  Stuff one of these guys way far up in a Kong and puppies will leave you alone for at least 10 mins while they work to dig it out.  I love these even more now.


Homemade Cheese Its
1 cup flour
4 tablespoons cold butter, cut into small squares
8 oz bag grated strong flavored cheese such as extra-sharp cheddar or parmesan
pinch of salt plus additional for sprinkling on top (optional)
Ice water
  1. Combine all ingredients in food processor, and pulse until crumbly. 
  2. Add cold water, a tablespoon at a time, until dough comes together. 
  3. Form into ball, wrap in plastic wrap, and chill in the freezer for at least 30 minutes. 
  4. Preheat oven to 350 degrees.
  5. Place dough between two pieces of plastic wrap or parchment paper, and roll out to 1mm  thickness Transfer to parchment-lined baking sheet, and, using pizza cutter or sharp knife, cut into 1 inch squares. Sprinkle with kosher salt and bake for 25 minutes. 
  6. Test for crispiness; crackers may take a few minutes more to finish crisping. 
  7. Remove from oven when crisp and just starting to brown. Let cool and serve.

Monday, January 16, 2012

Chunky Knit Throw Knit in One Weekend


Are you a member of Ravelry?  If you have crushes on all kinds and colors of fiber, chances are you already know all about Ravelry.  If not and you want to take up knitting or crocheting, Ravelry is like a candy store with a lot fewer calories. As of today, there were over 80,000 free knitting and crochet patterns and over 70,000 to purchase.  Ravelry is not just about the patterns though--I use it to search a yarn I'm thinking about purchasing to see what other have made with the yarn, or how they paired the colors.  If you do find a pattern you need to make, it's also quite fun to see what others have done with the same pattern.  Before I started my Hexagon crochet afghan, I used Ravelry to peek through the thousands of others that were making it to see what colors I was drawn to.  Some opted for muted colors, others had pastels and some had the bright rainbowesque colors that inspired mine.  It's also much better than using a web search for the same purpose as Ravelry users will most often post a photo of their projects but may not have a blog to post the same photos. 

I love yarn.  And I love packages of Brown Sheep that comes across in the mail.  


Like Pinterest though, you can spend so much time looking at all of the fabulous things to create that at the end of of the day, all you've done is just spend hours looking at a computer.  To rectify that, I printed out no fewer than 25 must make patterns.  Twenty-five patterns for a dedicated knitter is still probably over a year's worth of knitting.  For this girl it's probably more like 20 years worth.   I did cast on the Plain and Simple Pullover almost immediately, powered through all the way to where the knitting in the round splits into front and back, and then put it away for awhile.  Yep, that's my style. 


I think it's because I really like the brainless repetitive motion of knitting, which it ceases to be when you have to start counting stitches and paying attention to the pattern.  This is probably why I make a disproportionate amount of afghans. They are brainless and you don't have to look at them so you can focus on how way sexy Alex O'Loughlin looks on this week's episode of Hawaii Five-O.  I have no fewer than 3 blankets started at one time.

I started this knit one months ago.  I wanted a ruched throw inspired by the Anthropologie Cirrus Duvet I still love so much but since I made it 274 stitches wide it is SLOW going.  It's one of my goals to complete for 101 in 1001.  Hopefully.  Love how it's puckering but sad how an entire episode goes by in which Hawaii is saved from the ridiculously high crime waves spreading across the islands but my blanket has only grown by three rows. 


So yes, knitting is more about endurance and very rarely about the sprint.  Unless you grab some size 50 needles that is.  I just happened to be in need of some instant gratification so grabbed some 50s and some cheapo yarn. 

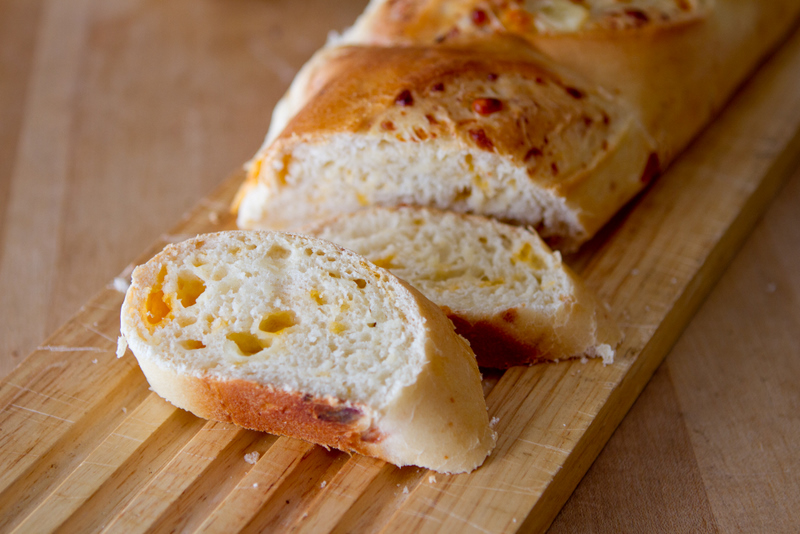
Confession time.  I often choose acrylic yarns when I make a blanket.  Wool is usually more itchy than a blanket should be and cotton has no stretch on the needles so isn't usually my first fiber choice for big projects.  That leaves acrylic, but I think the yarn companies have come a long way from the days of squeaky and rough acrylic yarns especially if you use a blend. Besides, when you knit and crochet blankets, the $4 skein feels so much nicer to the wallet then the $12 skein, especially since most blankets use 10-20 skeins.

So enough blah blah blah right?

This blanket can absolutely be knit in one weekend.  It was knit with 11 skeins of charcoal Charisma yarn from Michaels on size 50 needles.


The Charisma yarn was soft to the touch, the price was right, and truthfully, has even shocked me as to how soft it is when knit up on size 50s.  It's smushy soft actually. Not sure how soft it would be at a tighter gauge.

***Update on the yarn since I've been asked how it held up.  It's still super smooshy soft but has pilled quite a bit.  Not sure if it's totally the yarn or if it's Brooklyn and her nesting process of turning and pawing the blanket each time before she lays down.  I then throw it into a normal wash cycle since it's essentially been confiscated as a dog blanket--but it's a lot worse for the wear.  Just FYI***

I used a yarn winder to wind them into cakes just to ensure the center pull worked flawlessly--you don't want yarn rolling all over the chair or on the floor when trying to hold 3 strands together and the center pulls on purchased skeins always get tangled when I use them. 


Charisma is recommended to be knit on size 13s so I held three strands together for the size 50 needles, cast on 45 stitches and knit in a 3x3 rib (3 k, 3 p, reverse for the back.)  I have to say that size 50s is a lot like knitting with clubs. I never use straight knitting needles and will use my addi turbo circulars even for knitting back and forth as well as in the round.  I like the relatively small range of motion required to move the little circular knitting needles as opposed to the long knitting needles so knitting on the 50s felt especially painful.  But oh so fast.  I cast on my stitches and had used up the first three skeins in almost no time.  I used 6 more for the blanket and then two of the skeins to single crochet a border (twice around) with a size Q hook.  It's a smaller little lap blanket but so gratifying to have a finished object in only one weekend.  

The crochet flower accent is only one of oh so many free patterns available on Ravelry.

Brooklyn has agreed that it is indeed a super soft squishy blanket.  Thank goodness because really, all blankets in this house belong to her. 


Sunday, January 15, 2012

Denver Broncos Cake Pops


This entire season has baffled me....hire a not so winning coach, start Orton and replace him with Tebow, win the division with an 8-8 record and beat Pittsburgh in the first round of playoff games? Is it any surprise then that last night's game with decisions to keep the ball on the ground even through the 4th quarter while running plays that kept ball inbounds like they had all the time in the world was any less perplexing?  Even still, with a new coach and new QB, they gave us a more exciting season then most of us expected.  I say it was a good start to great things to come.

I do have to ask what on earth they feed those boys in New England.  They had to have 6 inches and 100 lbs on each Bronco.  It's probably pretty hard to defend against a receiver when you come up to his armpit. 

With the end of football season (in my mind) comes the end of all obnoxiously delightful brightly colored football food.  Not sure why I accept such crazy artificially colored foods during football season only, but it does seem essential.  Something about team spirit. 

We took this football season out with an orange and blue bang.  Sister made blue and orange brownies and cookies and I got a chance to try out my new cake pop molds....


I am not the most patient when it comes to molding individually sized foods which is why I love these molds I purchased from My Little Cupcake. I'd considered ordering them awhile back when it was just the cupcake shape but when I saw the additional molds, I snapped up a set for me and my sister. 

They make shaping cake pops so much easier.  My little cupcake site also had an idea to make the pops out of a homemade cookie dough that omits the raw eggs.  Yes please.  There was a recipe on My Little Cupcake's blog but I opted to just use the recipe on the back of the Nestle Tollhouse mini morsels bag and omit the eggs and add an extra 1/4 cup of flour.  If the recipe was good enough for Phoebe's grandmother....(if you get that Friends reference, we should knuckle bump here.)

Chocolate chip cookie dough was a little bit more difficult to mold in that the chips sometimes got caught in the crack as you were trying to close it, but aside from that, these molds were easy peasy and made the most perfectly shaped cupcakes and balls.  Yes, I can roll balls but not this perfectly spherical and even in size. 


Navy blue candy melts are not the easiest to find. I've never found anything but pastel blue from Wilton.  Make N Mold makes the navy blue and I've only found them at Hobby Lobby and even then they are most often sold out.  When I find them I do grab an extra bag or two as they are so intensely and perfectly navy blue.


When making the cupcakes you dip the bottom half first, add the stick and place upside down in an egg carton to let harden. 


Then you dip the top and add your sprinkles.  They really are that easy. 


This Game Day Eats posts needs more orange and blue food of course.

The blue candy melts are also pretty useful for making Bronco popcorn as well.  All you need is big bowl of kettle corn drizzled with about one cup of melted white chocolate.  Stir to coat, sprinkle with one cup of orange M&Ms or Reese Pieces, spread on baking sheet and drizzle with blue candy melts.

Yes, I picked out all of the orange M&Ms and Reese Pieces.  When I was back in Denver I could sometimes find bags of Broncos M&Ms but no such luck here.


Denver is moving back to their orange jerseys next year which has most of us old school fans pretty excited.  Maybe with the return of the orange jerseys we'll see a return of the Orange Crush.  Sadly they didn't crush much last night. 

BTW, have you had an Orange Crush soda recently?  I haven't had once in forever and seriously, wow.  I don't think that drinking a big glass of straight sugar would be as sweet as this.  It's all about Bronco party requirements though and Orange Crush is mandatory, if only to look at.


First Peanut, now Chipmunk.  We teach 'em young. 


Brooklyn took the loss the hardest. 


Wednesday, January 4, 2012

Panera Three Cheese Bread


Is there anything quite like the smell of freshly baking bread?  Just a hint of the warm, inviting scent is enough for me to know that carbs will always be a part of my life.  This bread is one of my favorites not just because it is just the perfect soft squishy bread, but also because it's one of my mom's staples.  In the 5 days I was in Denver for Christmas, she made this recipe 3 times.  No complaints here.


Yes the recipe calls for 1 1/2 cups of cubed cheese--that's what makes it so perfect.  Mom has substituted other cheeses such as cheddar, gouda and jack, but my favorite version is still the one with the salty Italian cheeses in the original recipe.  Seriously, I LOVE this bread. And I love it more when Mom makes it.  But when a craving comes along and Mom is not around, it's a super easy bread to make.  Everything can be thrown into the KitchenAid and then it's just shaping and baking so there's really no excuse to be without it.

Love this bread.  Period.  The end. 


Three Cheese Bread

STARTER
1 cup (8.375 ounces) warm water (95-105° F)
2 teaspoons (0.25 ounces) fresh yeast
1 cup (4.875 ounces) all-purpose flour

DOUGH
3/4 cup (5.75 ounces) warm water (95-105° F)
3 tablespoons (2 ounces) honey
4 teaspoons (0.5 ounces) fresh yeast
1/4 cup plus one teaspoon (2 ounces) vegetable shortening
4 3/4 cups (23 ounces) all-purpose flour
1 tablespoon (0.5 ounces) salt
1/2 cup (2 ounces) 1/2-inch cubes Romano cheese
1/2 cup (2 ounces) 1/2-inch cubes Parmesan cheese
1/2 cup (2 ounces) 1/2-inch cubes Asiago cheese
starter (recipe follows)

TO CREATE THE STARTER, combine the water and yeast in a medium mixing bowl. Stir to dissolve the yeast fully. Add the flour to the bowl and stir until the ingredients are fully incorporated. Cover with a cloth and ferment the starter at room temperature for 30 minutes.

FOR THE DOUGH, combine the water, honey and yeast in the bowl of a stand mixer. Stir to dissolve the yeast fully. Add the shortening, flour, salt, cheeses and fermented starter. Mix on low speed until the dough is fully developed. Remove the dough from the mixing bowl.

Divide the dough into 2 pieces weighing about 22 ounces each. Set aside any remaining dough and freeze for future use. Roll each piece of dough into a smooth ball. Place the dough on the counter or in a proofing basket and cover with a warm, damp cloth to rest at room temperature for 30 minutes. Preheat the oven to 400° F.

Form the dough into loaves, cover with a warm, damp cloth and proof at room temperature for 30 minutes.

Score the loaves with a sharp knife, spray with water and bake for 30 minutes, or until the crusts are a deep golden brown and the middle of the loaves is 190-200° F.

Remove the bread from the oven and place on a cooling rack for 30 minutes. If the bread was baked in loaf pans, remove the bread from the pans before cooling.

Sunday, January 1, 2012

Quinoa 365 and Southwestern Quinoa


I have fallen in love with a new cookbook I received recently.  True love really.  Cookbook # 80, Quinoa 365 by Patricia Green and Carolyn Hemming is chock full of so many wonderful sounding recipes, that I think I could actually go through it and just make every single recipe.  I've tried quinoa as a plain rice bed type substitute and have to admit to not loving it--I am 1/2 asian after all.  But making quinoa the center of the dish is pretty phenomenal and this cookbook showcases so many creative ways to add this protein packed little grain to your diet such as quinoa breakfast burritos, ranch house omelet, quinoa bean dip, cauliflower and broccoli bake with almonds, chicken broccoli casserole, quinoa crusted chicken breast, spanikopita frittata, mexican casserole, cheesy spinach and quinoa stuffed pasta, greek burgers and even whole chapters on muffins, cookies and cakes made with quinoa flour. My only criticism is that is has rather few photos and photos do make the cookbook.  

I've already tried a few other recipes and they were pretty spot on in flavor.  I'm not usually a casserole fan which I attribute to traumatic childhood interactions with green bean tatertot casserole. I do however like an occasional tuna noodle casserole (go figure right?!?) given that it is not made with any thing resembling a Campbells cream of mushroom soup.  I haven't had tuna casserole in ages, so thought the tuna quinoa casserole might be a good first recipe to test the waters with this cookbook and it turned out to be a pretty tasty casserole--score one for the cookbook.  The pina colada quinoa was also pretty tasty.


For recipe number three I went straight for the southwestern flavors and have to say it's been my favorite recipe so far.  Not "healthy" tasty, but "I'd eat this everyday because it's so yummy" tasty.  I did bump up the spices quite a bit because I like my southwestern food to be flavor packed, but all of the spices can be reduced to taste. The original recipe also calls for regular chili powder rather than chipotle, but I am a diehard chipotle fan. 


Brooklyn also enjoyed reading this cookbook despite the lack of photos.  She doesn't mind so much.


Southwestern Quinoa Salad
Adapted from Quinoa 365

Ingredients

1 cup quinoa, rinsed and drained
2 cups water
3/4 cup jarred salsa
1 tsp chipotle chili powder
1 tsp ground cumin
1 cup cooked corn kernels
1 1/2 cups cooked black beans, rinsed and drained
2 medium tomatoes, chopped
1/4 cup finely chopped cilantro
3 green onions sliced thinly crossways
1/2 cup plain yogurt
1 tbsp lime juice
1 tsp salt
1/2 tsp freshly ground pepper
1 tsp garlic powder
1 avocado diced (optional)
1 cup shredded cheddar (optional)

  1. Bring the water to a boil, then stir in the quinoa, lower the heat and reduce to a simmer.  Cook for 10 mins and turn off heat.  Cover and let sit for 6 mins - you'll know the quinoa is ready when you see the little white "tail" of the germ around the outside edge of each seed.
  2. Add salsa, chili powder and cumin to quinoa and mix well.
  3. Mix in cilantro, green onions, black beans and corn.  Mix until thoroughly combined.
  4. In a small bowl whisk yogurt, salt, pepper, garlic and lime juice.  Drizzle over quinoa and toss.
  5. Serve with avocado and cheese and garnish with additional cilantro if desired.