Showing posts with label Ingredients. Show all posts

Tuesday, November 12, 2013

Persimmon Turnovers


Have you ever had a persimmon?  Right around November, these bright orange beauties start popping up in the stores and I go a little over the top.  This season I've already managed to eat over 20lbs of these....by myself.  If they weren't fruit, I'd be ashamed at my lack of control.  

It's difficult to describe the flavor to someone who's never had one...it's definitely nothing like the tomato it resembles.  

Or clarification...the Fuyu persimmon resembles a tomato.  This kind of persimmon can be eaten at any stage.  I start eating them as soon as they first hit the market in bulk and at that point they are a little green still and not the slightest bit soft.  I think they are still pretty fabulous in this stage...apple like in crispness and you can eat the peel just like an apple.  As the season progresses though, these become bright orange and when they are ripe, they are squishy, yummy sweet soft.  The peel never softens so I stop eating those once the texture of the inside fruit becomes softer than the skin. 

The Hachiya persimmon however, is shaped a lot like a human heart and requires that it be completely ripe or you are in for one nasty, astringent, cottony textured surprise.  When ripe though, they are even sweeter than the Fuyu.

I usually just stick to the Fuyus because they are easy . And after eating my 20lbs this season, I thought I'd try baking with these little babies....finally.  I say I'm going to bake with them every year and then I can't seem to sacrifice even one to the baking sheet. 


I used super ripe sweet persimmons with a bit of cinnamon, salt, flour and brown sugar and cooked for about 5 minutes until flour thickened.  If I were baking a pie, or using pie crust, I probably wouldn't have pre-cooked the filling.


A few premade puff pastry sheets and these came together pretty quickly. 


I adore puff pastry.  Or any pastry really.  


The result wasn't too bad.  Il oved the cinnamony goodness and I pretty much like anything wrapped in puff pastry.  Truthfully though, I'm really just as happy snacking on a persimmon in its raw and perfect state.  If you like to mix it up though, this is quite reminiscent of an apple pie, with a bit of a flavor twist. 


Random dog picture.   

Because I can. 


Persimmon Turnovers

4 ripe Fuyu persimmons, peeled and diced
1/3 cup firmly packed brown sugar
1 tbsp flour
1 teaspoon ground cinnamon
1/2 teaspoon grated orange peel
1 tablespoon butter
puff pastry sheet cut into squares
1 egg white with 1 tsp water, well beaten
Sugar in the raw for sprinkling (optional)

Directions:
  1. Preheat oven to 400 degrees
  2. In a medium saucepan combine persimmons, brown sugar, flour, cinnamon, orange peel and butter.  Cook over medium heat for 5 minutes or until flour thickens.  Depending upon ripeness of persimmon, you may need to add 1 tbsp of water.
  3. Spoon filling into center of puff pastry square.  Dip your finger in water and run around the edges of puff pastry dough. Fold puff pastry over diagonally and press all edges to seal
  4. Brush top with egg mixture and sprinkle with sugar in the raw. 
  5. Bake for 20-22 minutes or until golden brown. 


Friday, February 22, 2013

Spring Veggie Corned Beef Hash


We finally just had a bit of snow around these parts.  Unfortunately, just a bit is the correct description...down where I live it was 5-6 inches.  How I ask, can we live a mile above sea-level, right outside of ski country, and still be getting less snow than the eastern seaboard or the midwest?  To say that I have Nor'easter or Midwestern Blizzard envy is an understatement.  Our piddly few inches over this winter and and the appearance of the first asparagus of the season gives me a bit o' spring fever. 

Can you simultaneously have spring fever and wish for 12-24 inches of snow?

With my fridge stocked full with asparagus, I was scrambling for recipes to make.  As usual, my eyes and my goals are bigger than reality and there is asparagus falling out of the fridge.  

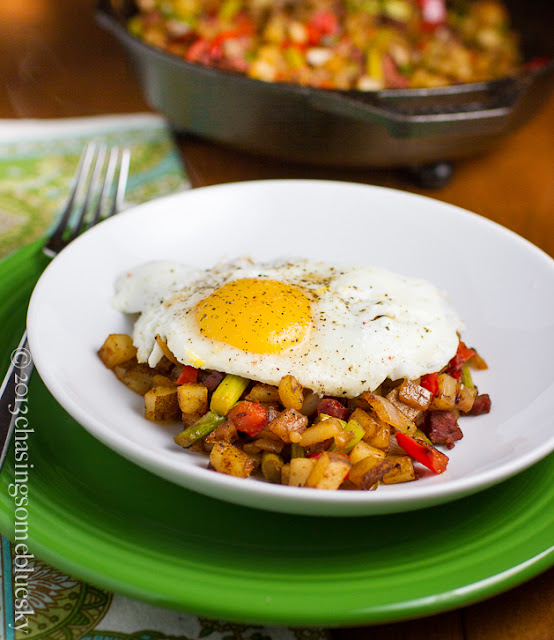
Asparagus is awesome in soup, just steamed, broiled with olive oil and in spring hash.  Corned beef hash to be precise. 

Look at those colors.....precisely why I adore produce so much.


When I make corned beef hash I usually just buy a thick slice of corned beef from the deli.  One fat slice (6-7on the deli cutting scale) adds more than enough corned beef for my taste.  With St. Patty's day around the corner, this would be a great use for leftover corned beef as well. 


Cast iron skillet is a  phenomenal choice for making hash.  If you get the pan nice and hot, the potatoes and corned beef get a fantabulous browning that is essential for hash.  The breakfast kind of course--not the Colorado approved special kind. 


Gratuitous cuteness shot. 


Spring Veggie Corned Beef Hash

Ingredients:
2 cups diced potatoes, skin off or on
1 cup diced onion
1 red bell pepper, diced
1 1/2 cup asparagus chopped into 1 inch pieces (woody ends discarded)
1 thick slice of deli corned beef (about 1/4 lb)
1 tbsp olive oil
freshly ground black pepper to taste
Fried egg for serving

Directions
  1. Place diced potatoes in medium saucepan, cover with water and boil on medium until the potatoes are tender enough to eat, but still firm enough to fry (about 7-10 mins for a 1/4 inch dice size)
  2. Drain in colander and set aside.  
  3. Heat cast iron skillet over medium.  Add olive oil and onions.  Cook for 4 minutes, stirring often. 
  4. Add red peppers and asparagus and cook 3-4 minutes. 
  5. Add corned beef and potatoes and stir to mix well. Press hash down in pan and allow to brown and crisp.  Flip by section, press down and allow second side to brown and crisp
  6. Serve topped with fried egg cooked to your preferred firmness 

Friday, September 7, 2012

Green Chile Hummus


How exactly do you begin sorting through hundreds of vacation photos?  I think procrastination has it's place sometimes...so instead of looking those photos full on in the face, I got back into my humble little kitchen after a week away.  Green chiles are still my great love affair of the moment.  Paired with hummus, it's a perfect blend of smooth lemony hummus and a bit of green chile kick. 


Does hummus really need a recipe?  You just throw one 15 ounce can of drained garbanzos into a food processor along with juice of one lemon, 1/4 cup olive oil, one heaping spoonful of tahini(some say this is optional but I think tahini is essential)  and 2 garlic gloves and puree like CRAZY.   To make it green chile hummus I threw in 2 freshly roasted chiles peeled and chopped and 1/2 tsp cumin before pureeing. 

Easy peasy.


I love buying those fancy schmancy sandwiches for lunch that have hummus in them.  Throw them on a sandwich or wrap at home and you'll think you have a pretty schmance sandwich too. 

Hummus is much easier than sorting through vacation photos. 


Green Chile Hummus

1 15oz can garbanzos rinsed and drained
2 garlic cloves, roughly chopped
juice of one lemon
1/4-1/3 cup extra virgin olive oil
2 freshly roasted and peeled green chiles, roughly chopped
1 heaping tbsp tahini
1/2 tsp cumin

Add all ingredients to food processor and blend thoroughly

Tuesday, August 21, 2012

Green Chile Chicken Enchiladas


Is it true that farmer's market season will soon be over?  I'm enjoying the produce hoarding while it lasts.  Every week I head over and pick up my juicy Palisades peaches, fresh sweet corn on the cob and of course, now that they are in season, fresh roasted Hatch green chiles. 

Except.

Yes, except that this past weekend  the line for the chiles was atrocious and they couldn't roast them to keep up--Coloradans love their fire roasted Hatch chiles it seems.  The options were to either skip green chiles for a week or figure out another plan.  Since going without chiles even one week wasn't really a true option at any point, I picked some up at the grocery store and tried this roasting business myself. 


I'm fairly embarrassed to admit it was so very easy.  Super simple easy.  Super deduper easy.  My whole life I've labored under the conviction that chiles had to be roasted by those super cool guys who put them in the large cylindrical bingo cage and spin them while they roast.  

But alas, these can be done at home.

Throw them on a grill preheated to high and just toss them around every couple of minutes.  Literally.  No oiling them, no laying them evenly across the grates.  Grab a pair of tongs and toss, toss, toss.   Remove when charred and place in plastic bag.  Tie tight and let steam so peels will slide right off. 


When the chiles are cool you can slide the skins off, remove the stem and seeds and rinse to clean.  Then you just dice them up.  The hardest part by far is the cleaning and you still have to do that with the roasted ones you buy at the market.  Even better is the cost savings--roasted chiles at the farmer's market are $3.50/lb.  Home roasted chiles are $.99/lb.  I'll still end up supporting the man that spins them at the market because I always want him to be there happily spinning and fragrancing the air with roasted chile goodness, but $.99/lb is the kind you buy to dice up and store in baggies in the freezer for your winter green chile feasts. 


When you buy chiles each week though, it becomes a challenge as to what to make next.  I've made omelets, chicken green chili, green chile tortilla soup, quesadillas, and about a zillion other things I could think of.  This weekend I was craving enchiladas.  

I threw some chicken on the grill, shredded it up and mixed it with diced chiles, grated cheese and a bit of enchilada sauce.  Roll filling inside of a corn tortilla....


Gratuitious Boston Terrier shot. 


Pour enchilada sauce into bottom of baking dish, add enchiladas and top with enchilada sauce and some more green chiles because these are green chile enchiladas.  You might opt for the medium or mild chiles if the spice level is a bit higher than your taste buds like.  I used hot chiles and these were on fire.  In that delicious green chile way of course. 


Top with more cheese


Bake for 20 minutes and serve.   I'd never had green chile enchiladas before they are a little reminiscent of chili rellenos.  How bad can that be right?


Green Chile Chicken Enchiladas

Ingredients:
3 cups shredded chicken
1 1/2 cups dice green chiles
2 cups shredded cheese
1 can (28 oz) green chile enchilada sauce
corn tortillas (room temp)

Directions:
  1. Preheat oven to 325
  2. In a large bowl, mix together shredded chicken, 1 cup green chiles and 1 cup of the shredded cheese.  
  3. Add 3/4 cup of the enchilada sauce and mix well
  4. Spread 1 cup enchilada sauce across the bottom of an 11x7(ish) baking dish
  5. Spread a heaping spoonful of chicken filling down the center of a tortilla.  Roll sides up and place seam side down in prepared baking dish.  Repeat until all filling is gone. 
  6. Top with 1 cup of sauce and remaining 1/2 cup of green chiles.  Sprinkle remaining cheese over top
  7. Cover with foil and bake for 20-25 minutes or until heated through and cheese is bubbling. 

Sunday, August 19, 2012

Chocolate Zucchini Loaf


I have a friend at work who used to bring me these zucchinis from her garden.  Now that I'm back at this job, I walked into my office the other day and found a zucchini on my table.  I gratefully accepted because who doesn't love home grown produce?  

This one was a little on the bigger(enormous really) side so while a I grilled a few slices, the rest went into the food processor for shredding and became an obviously super healthy vegetable chocolate loaf.  Okay so while not the healthiest food out there,  there was gobs of zucchini and just a bit of sugar in the loaf.  

I love that you can still see streaks of green in the loaf. Chocolate + zucchini = summer happiness.


Chocolate Zucchini Loaf

Ingredients:
1/4 c canola oil
1/4 c greek yogurt
1/2 c packed brown sugar
1 tsp vanilla extract
2 eggs
1 1/2 c shredded zucchini
1/2 c whole wheat flour
1/2 c all purpose flour
1/2 c unsweetened cocoa powder
1 tsp baking powder
1/2 tsp baking soda
pinch of salt
1/2 c mini chocolate chips (or regular)

Directions:
  1. In a mixer, combine oil, yogurt, sugars and vanilla. 
  2. Mix in eggs one at a time and then add shredded zucchini. 
  3. In a separate bowl, whisk together flours, cocoa, salt, baking soda and baking powder. 
  4. Slowly add this dry mixture into your wet mixture. 
  5. Mix until just combined. 
  6. Stir in chocolate chips.
  7. Pour batter into a greased 9x5x3 loaf pan, and bake at 350 degrees for 50-65 minutes, or until done

Friday, June 8, 2012

Greek Panzanella


Summer produce season is finally here.  Sigh of contentment here.  I know it's early in the season but I get so excited when I see those weekend farmers markets popping up.

"I think that I shall never see, a poem lovely as a tree tomato".


All those tomatoes made me think greek salad.   I love the saltiness of both the olives and the feta paired with the sweetness of tomatoes and roasted peppers with just that bite that comes from onion.  Greek salad is pretty perfect. 

Unfortunately when you a produce hoarder like me, you have more than enough ingredients after you have your basic salad.  I started thinking greek quinoa of some sort, and then spied with my little eye, a little french boule that I bought intending to make french toast but just never got around to.  Stale bread screams panzanella doesn't it?


I made it all the way through the chopped veggies when I started wondering if I should use a regular 'ole greek salad vinaigrette or if greek panzanella called for something a bit schmancier.  A quick flip through some cookbooks and wouldn't you know, Barefoot Contessa actually had a Greek Panzanella.  Maybe I'd stored it in my mind once upon a time as a "must make" recipe.  The veggies were slightly different and I really like roasted peppers in greek salad, but I opted to use her vinaigrette.  Glad I did--perfect amount of tang, salt and loved the dijon addition. 


Summer activities and festivals are in full swing here in the Mile High City.  One of my favorite annual events is the Chalk Art Festival in Larimer Square and I always seem to go with the same friend.  Funny how you get in a groove with events.   I was a little disappointed that there weren't more of those "wow" 3D perspective drawings, but still admired the vibrant colors and beauty and the amount of effort that goes into each one of these.   I can't begin to comprehend the amount of dedication it took to spend hours upon hours on the hot street coloring and shading and even using little vacuums to suck up the chalk dust to create these fun drawings.

Yes, I acclimated back to Denver very nicely and do think 85 degrees is a really hot day. 


Summertime on a plate.


Greek Panzanella

adapted from How Easy is That by Barefoot Contessa

Ingredients:
1 small French bread or boule, cut into 1-inch cubes (6 cups)
3 garlic cloves, minced
4 tbsp olive oil
2 large tomatoes diced
2 persian cucumbers (about 1 cup)
1 red bell pepper roasted, peeled and diced
1/2 red onion, sliced thinly
1/3 cup finely diced or crumbled feta cheese
1/2 cup Kalamata olives pitted and cut into quarters

For the vinaigrette:
2 cloves garlic, minced
1 teaspoon dried oregano
1 teaspoon dijon mustard
1/4 cup good red wine vinegar
1 teaspoon salt
freshly ground black pepper
1/3 cup extra virgin olive oil
Directions

Directions:
  1. Preheat oven to 350
  2. Heat oil in a small pan over medium heat. Add garlic and cook for 2 minutes taking care not to burn garlic.
  3. Drizzle garlic oil over bread cubes and toss to coat.  Pour onto baking sheet in  a single layer and bake for 15-20 minutes or until golden brown.  Use a spatula to turn bread cubes at least once while baking. You can prepare up to this point a few days in advance.  Store croutons in airtight container until ready to use. 
  4. Place tomatoes, cucumber, roasted red pepper and red onion in a large bowl.
  5. For the vinaigrette, whisk together the garlic, oregano, mustard, vinegar, 1 teaspoon salt and the pepper in a small bowl. While still whisking, add the olive oil and make an emulsion. 
  6. Pour the vinaigrette over the vegetables. 
  7. Add the feta, olives and bread cubes and mix together lightly. 
  8. Set aside for 30 minutes for the flavors to blend. Serve at room temperature.

Friday, November 26, 2010

Blueberry Kefir Pancakes and Tomato Peach Salad

Happy belated Thanksgiving!  Hope everyone had a blessed and safe holiday!

Yeah, the title of the post is a bit odd but I'm not actually advocating that these two dishes go together.  Promise.

I love the Edible Communities magazine series.  Edible has a series of food magazines catering to local foods, recipes and food articles.  And it's usually free in the foodie shops--can't beat that.   While I can easily grab the latest Edible Front Range copy right at Whole Foods, I hadn't had much opportunity to browse through any of the other community copies.  Edible Aspen?  How did I not pick one of those up on my last trip up there?  Edible Manhattan or Edible Brooklyn?  How fun.  Edible Cape Cod?  Yes please.  Edible Hudson Valley?  Hey I know that place.  And Edible Bozeman?  I wish I had known it existed prior to one of my many business trips up there.

I did however pick up Edible Santa Fe on our Labor Day trip down there.    Seriously read this cover to to cover--I'm now well versed on "Honey: the art of the bee."  Thank goodness. 

I tried two recipes and loved them both so much that I felt it was a bit unfair to choose which to post....hence the two recipe post.  Try and pick...it's not easy. 

First off was the recipe for Kefir pancakes.  I happened to have blueberry kefir and fresh blueberries but these can be adjusted for whatever flavor of kefir you buy.

What is kefir? According to Edible Santa Fe, "Kefir, like yogurt, is a cultured, enzyme-rich food filled with friendly microorganisms that help balance your inner ecosystem.  More nutritious and therapeutic than yogurt, it supplies complete protein, essential minerals and valuable B vitamins."  I don't know how therapeutic I actually find yogurt to be, but it sure is tasty--as is kefir.  Aside from kefir being a bit "tangier" than yogurt, I'm not sure I could tell them apart in a taste test.


The extra tang in kefir lends itself perfectly to pancakes...think buttermilk pancakes.  And between the kefir and the baking powder and baking soda, this batter makes a super light and fluffy pancake despite the fact that I used whole wheat flour.  The batter itself rises right in the bowl before I'd even made half of the pancakes.  Imagine the fluffiness that would result from all purpose flour. Definite keeper recipe in this house.


The second recipe was for a Tomato Peach Salad.  Even more exciting was trying out the orange mucat champagne vinegar I'd found at Trader Joes.  Ohh, such an exciting salad if you are a tomato and peach fan.  Tangy, sweet and with a bite from the onions and dressing. Another keeper recipe--yay Edible!


Blueberry Kefir Pancakes

1 cup whole wheat flour
1/2 cup wheat pastry flour
2 teaspoons baking powder
1 teaspoon baking soda
1/4 teaspoon salt
3 tablespoons melted butter
2 large eggs
1 1/2 cups kefir
1 cup frozen blueberries

1. Preheat a griddle or skillet to just under medium heat.
2. In a large bowl, sift together the flours, baking powder, baking soda, sugar and salt.
3. In another bowl, whisk the eggs, then whisk in the kefir. Add the melted butter and whisk together.
4. Add the flour mixture to the wet ingredients and mix just until moistened. If you overmix the batter, it will not be light and fluffy
5. Lightly grease preheated pan with canola oil. Drop about 1/4-1/3 cup onto the hot griddle to form each pancake. Sprinkle blueberries over each pancake. When numerous bubbles have risen to the top of the pancakes (about three minutes), turn and cook for about one minute on the other side, until nicely browned. Remove from heat and continue until all of the batter is used up.
6. Serve hot, topped with additional thawed blueberries and warm maple syrup.

Heirloom Tomato and Peach Salad

2 lbs heirloom tomatoes
1 lb ripe peaches
1/2 smal red onion finely diced.
2 tbsp extra virgin oive oil
2 tbsp freshly squeezed OJ
2 tbsp vinegar
1/2 teaspoon freshly grated lemon zest
dask of salt
1/4 cup fresh basil, torn or sliced

Cut tomatoes and peaches into relatively similar sized pieces. Add onions. Whisk together oil, oj, vinegar, lemon zest and salt to make dressing.  Pour dressing over tomato and peaches.  Add basil, toss and serve.

Thursday, September 16, 2010

Soy Chorizo and Goat Cheese Quiche

I think I once confessed my fascination with ingredients.  I think that so often the parts are more important than the sum of the parts when it comes to cooking in this kitchen.  Backwards I know, but each food store feels like a treasure hunt.

Still riding the Trader Joe's grocery high, I gave Soy Chorizo a chance.  Looks intriguing enough...
 
But pulled out of it's casing, it did not bode well. It kind of looks just like sausage yes?  Probably the entire point of the product--duh Mary.


In fact, brown it up, and it looks remarkably indistinguishable from sausage. This is probably great news if you eat soy "sausage" for personal reasons.  If however, you are put off by the very texture and meatiness of sausage, soy chorizo may not be the answer.  This seemed so truly meaty, I swear I saw a fully intact lymph node.  But I fully acknowledge that I have a lymph node paranoia.

 
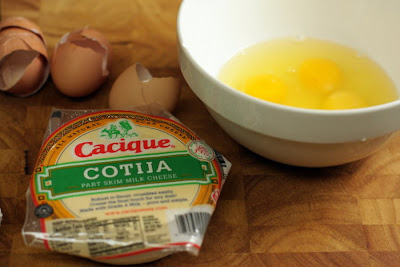
Cheese however, is safe and absolutely divine.  Cotija is no exception.  Throw in Goat Cheese and fontina and how bad could this be?


Not bad at all.  In fact pretty great.  Bobby is a genius, and Throwdown is just spectacular TV, but that's a given.  There were a few bites where I had to mentally convince myself I wasn't eating real chorizo. That's probably a compliment to this product-kind of creepy to me.  But all in all, the flavors were spicy and the cheeses were tangy and gooey.  Then again, I'd probably say that Bobby pours cereal in such a culinary fascinating way, it could never be replicated.  Such is the life of a Food Network groupie.

Note:  The recipe on Food Network's site calls for making your own crust.  There are so many things I will do in the kitchen, making my own pie crust is never one of them.  I haven't made one from scratch since 1995 and I surely wasn't going to make one from scratch at 6am on a Sunday morning. Especially with Team Canine and Team Feline trying to decide if they could possibly like each other or eat each other right at my feet. So this crust is of course Pilsbury--pulled from the fridge, unrolled directly into the tart pan, docked and pre-baked with weights at 375 for 10 mins.


Soy Chorizo and Goat Cheese Quiche
Adapted from Throwdown with Bobby Flay


One pre-baked pie/tart crust--still slightly warm.
1/2 package soy chorizo, casing removed
1/4 cups grated fontina cheese
1/4 cup finely grated Cotija cheese
1/4 cup red onion finely sliced
5 large eggs
1 cup milk
2 ounces soft goat cheese, frozen for 10 minutes and cut into 1/2-inch pieces
couple of dashes of hot sauce because mo hotta is mo betta (optional)

Directions


1.Preheat oven to 350 degrees F.
2. Heat  a large saute pan over med high heat. Add the chorizo and cook until golden brown-about 3-5 mins. Let cool slightly.
3. Scatter the fontina, Cotija, chorizo and thyme over the warm tart shell. Whisk the eggs in a large bowl. Add the milk and hot sauce and whisk until smooth. Pour into the shell and evenly and distribute the goat cheese and sliced onions over the top.
4. Bake until the crust is deep golden brown and the center is almost set (still slightly jiggles) but the sides are set, about 25 to 35 minutes. Let sit at room temperature for at least 20 minutes before serving. Cut into wedges for serving.