Monday, December 27, 2010

Red Velvet Cupcakes


Oh, I debated on this post for a bit.  I'm kind of over baking and sweets right now. Way over.  Christmas is the best and the baking is fun, but after awhile, you just kind of get tired of seeing baked goods everywhere yes?

But then I saw the picture...bright red cupcake and white glossy and creamy cream cheese frosting.  Well, it was worth a post. As is another of Nigella's recipes from Nigella Kitchen.

And while the red is very eye catching and I'm obviously a HUGE fan of the whole red and white pairing, I am a bit curious about our fascination with red velvet cake.  When I was buying the cake flour, a woman reached right into my cart and moved the items around to look at the box... "I thought it was red velvet cake mix and was going to run right back and grab some." Any cake that inspires complete strangers to fondle your groceries is a bit fascinating. (Turns out Nigella's recipe uses all-purpose flour btw).

So is it the flavor or the color that everyone loves so much?  If it's the color, is it just the novelty of red cake?  We have many red foods--strawberries, beets, cherries to name just a few. Or is it the flavor? You think it's vanilla, and you know it's not chocolate, but it has that slight chocolate kiss that makes it different from vanilla or chocolate.  I think it must be the flavor.  But if that were truly the case, then why wouldn't we make velvet cake that has the slight reddish tinge that comes naturally from vinegar and cocoa?  Why the entire bottle of dye? No, I think we love the color of our red velvet cake just as much as the flavor.


It truly is a color that doesn't come naturally.  Jamie Oliver's red velvet cake called for a natural red food coloring.  I love that idea.  At $15 a bottle and with a cake that uses an entire bottle, it was not to be.  Surely, it's okay to splurge a bit with color at Christmas....oui? Nigella called for the Wilton's Christmas red.  I used Red-Red.  They also make a "no taste" red.  Not sure what red tastes like, but I'm guessing all three of those Wilton colors look identical in a cupcake.


While I followed Nigella's ingredient list, I changed up her directions. Here at high altitude, cakes do funny things in my oven all the time and more often than not, come out flatter than a pancake.  I know that wet ingredients first, dry ingredients second with a bit of extra flour, usually works here.  Nigella's recipe has wet and dry and eggs and dry and wet until I was sure that these would sink into oblivion in my kitchen.  They still sunk a little. Frosting hides a multitude of errors.


While I'd like to think it's the flavor, I think I personally love red velvet cupcakes for their beauty.  Is any other cupcake quite as delightful to look upon?


Red Velvet Cupcakes

Ingredients

  • 1 2/3 c. all purpose flour 
  • 2 tbsp cocoa powder
  • 2 tsp baking powder
  • 1/2 tsp baking soda
  • 7 tbsp of butter, room temperature
  • 1 c. sugar
  • 2 eggs, room temperature
  • 1 heaping tbsp red paste food coloring
  • 1/2 teaspoon of salt
  • 3/4 cup of buttermilk
  • 1 1/2 tablespoons of red food coloring
  • 2 tsp of vanilla extract
  • 1 tsp cider vinegar
Frosting ingredients
  • 1/2 cup of butter (1 stick), room temperature
  • 4 oz cream cheese (1/2 package), room temperature
  • 2 - 3 cups of powdered sugar
  • 1 teaspoon of vanilla extract
  • red sugar crystals for decoration (optional)
1 Preheat the oven to 350°F. Combine dry ingredients.
2 In another bowl, beat the butter and sugar in an electric mixer for 3 minutes on medium speed until light and fluffy. Add the eggs, one at a time, beating until each is fully incorporated. Be sure to scrape down the sides of the bowl to ensure even mixing.   Add food coloring paste and mix completely.
3 In a large bowl, sift together the cake flour, cocoa powder, baking soda, baking powder, and salt. In another bowl whisk together the buttermilk, vinegar, vanilla extract.
4 Add a fourth of the dry ingredients and mix, then add a third of the wet. Continue adding in a dry, wet, dry pattern, ending with the dry ingredients.
5 Scoop into cupcake papers, about 1/2 to 3/4 of the way full. Bake for 18-22 minutes or until a toothpick comes out clean. Rotate the pan after the first 15 minutes of baking to ensure even baking.
6 Allow to cool for one minute in the pan then transfer to a wire rack to cool completely. Makes about 2 dozen cupcakes.

The Frosting
1 Cream the butter and cream cheese together, about 3 minutes. Scrape down the sides and bottom of the bowl to ensure even mixing.
2 Add the vanilla extract and mix.
3 Add the powdered sugar, continually taste to get to desired sweetness. Pipe onto cooled cupcakes.

Tuesday, December 21, 2010

Lunar Eclipse

Just in case you missed it last night/this morning...


Friday, December 17, 2010

Cookbook #70, Nigella Kitchen


When I lived in NY, I had some friends from Jamaica.  A couple of times a year, we'd head down to Brooklyn Tabernacle to hear the choir and then back to their place for the most amazing homecooked Jamaican meal ever...patties and jerk and rice, oh my.   One of Andrea's staple dishes was "rice and peas" a fabulous, savory coconut rice with beans.  Andrea always explained why they were called "peas" and not beans, but truthfully, I was too busy shoving my face with her cooking, that I don't recall the reason.

When I received Nigella's latest cookbook Nigella Kitchen, I began my standard processs of flipping through the book and adding sticky notes everywhere.  This was definitely a one whole pack of sticky notes kind of book...Irish Oaten rolls (with Guinness), Guinness Gingerbread (do you see Nigella's genius?), Coconut Cherry Banana Bread,  Chocolate Orange Loaf Cake, Papardelle with Butternut and Blue Cheese...it's all good. I had big plans for the Red Velvet Cupcake recipe, that is until I saw the Jamaican Jerk  and Rice and peas recipe.

The ingredient list is long and may be a deterrent initially, but after reading through, I saw that these were spices I already had and it was really just prep the night before.  Cooking the chicken and rice on the second day was easy peasy. 


Most of the rice and peas ingredients came straight from the can--the total effort was chopping onions, and then dumping everything in a pot and letting it cook for 15-20 minutes.


The verdict?  I'm a little torn on this one.  I think the chicken broth in the rice detracted from the coconut flavor of the rice.  If I made it again, I'd either halve or elimate the broth.  I also think both the rice and the chicken had a bit too much thyme and not enough heat.  I think Nigella went a bit meek on this--shouldn't traditional jerk have Scotch Bonnets?  Other than that, it was pretty tasty.  It's definitely not Andrea's, but I've never found Jamaican as phenomenal as hers. 
And the rest of the cookbook?  I'm hoping to find out sooner than later.  I have a couple other recipes tagged for this week, and the Red Velvet Cupcakes planned for Christmas Eve.


Homestyle Jerk Chicken with Rice and Peas
From Nigella Kitchen

Ingredients

  • 6 chicken breasts
  • 2 tsp ground allspice
  • 2 tsp dried thyme
  • 2 tsp cayenne pepper 
  • 2 tsp ground ginger
  • 2 tsp ground nutmeg
  • 2 tsp ground cinnamon
  • 2 garlic cloves, peeled
  • 2 in piece fresh ginger, peeled and cut into chunks
  • 2 tbsp dark muscovado sugar
  • 1/4 cup dark rum
  • 1/4 cup fresh lime juice 
  • 1/4 cup soy sauce
  • 1/2 cup cider vinegar
  • 2 whole fresh red chilies
  • 1 onion, peeled and quartered

Directions

  1. Slash the chicken breasts, 3 slashes per breast, making each slash cut about 1in deep into the meat on the diagonal. Put the chicken breasts into an oblong dish, slashed-sides down.
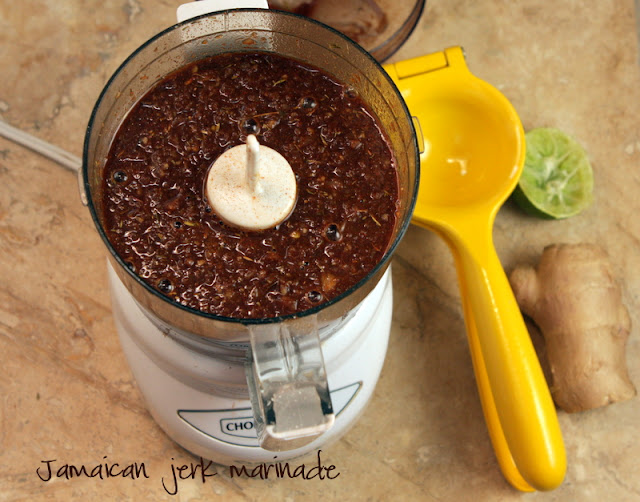
  2. Put all the other ingredients into a food processor and blitz to a dark, earthy paste, then pour and spread over the chicken pieces and leave to marinate, out of the fridge, for 2-4 hours, or in the fridge, covered, overnight.
  3. Preheat the oven to 400F. Double-line a shallow roasting tin with aluminium foil. Tip into it the chicken, with its marinade, placing the chicken breasts slashed-side up. Roast for 30 minutes.
  4. Take the tin out of the oven and pour off any excess watery juices. Use a pastry brush and a spoon to place any paste that has fallen off the chicken back onto the chicken, then return it to the oven and cook for a further 30 minutes, by which time it will be cooked through and tender with a thick, fiery crust. Serve with rice and peas.

Rice and Peas Ingredients

  • 1 can kidney beans or black-eyed peas
  • 1 tbsp vegetable oil 
  • 1 onion, peeled and finely chopped
  • 1 red chili, de-seeded and finely chopped
  • 2 garlic cloves, peeled and finely chopped
  • 2 cups long-grain rice 
  • 1 14fl oz can coconut milk
  • 1 can chicken or vegetable stock
  • 1 tsp chopped fresh thyme leaves
  • salt, to taste

Directions

  1. Drain and rinse the beans/peas, and heat the oil in a heavy-based pan that has a lid.
  2. Fry the onion for 4-5 minutes, stirring every now and again, letting it soften and brown a little as it fries. Add the chopped chilli and garlic, and give everything a good stir around.
  3. Stir in the rice, making sure it is all slicked with oil, then pour in the coconut milk and chicken or vegetable stock, and stir in the drained gungo peas.
  4. Bring the mixture to a bubble, clamp on the lid, turn down the heat to its lowest setting and let the rice cook gently for 15 minutes.
  5. Check the rice is cooked through and the liquid is all absorbed – give the rice another 5 minutes if need be. Sprinkle with the freshly chopped thyme, and season with salt if desired, forking it through. Serve with jerk chicken.

Thursday, December 16, 2010

It's a Christmas Cashmere-acle: Recycled Sweater Blanket


Alternate post title "Enabling Rottenness in Pets."

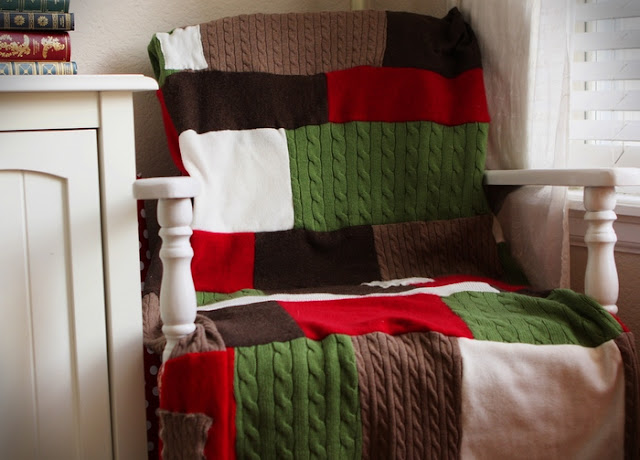
Miracles abound during the Christmas season... I finished a sewing project!!  This particular project has been "accumulating" since last year.  See, I noticed last winter that instead of sleeping in one of her 5 beds, Minxaroo was nesting in my sweaters in the closet.  She was especially fond of cashmere--can you blame her?  So as sweaters became misshapen or ruined, I started saving a few here and there.  I had seen some recycled sweater blankets on Etsy for......$200. Now, I'm not saying that it's not a lot of work or the price isn't justified, I just knew I would enjoy it so much more if I made it myself...and it was free.  When I noticed that Brooklyn would go into the hamper and pull sweaters, I knew it was time to get to work.

Process?  None that is repeatable or documentable.  I started with a few squares and rectangles  and then cut each piece to fit.  I worked by sewing entire rows together first and then to the blanket, but the secret to the "contrived randomness" is to switch edges periodically so that blocks don't always line up perfectly in rows. I also threw in a few patches for a little more rustic appeal. 

I was actually quite pleased with the result which is saying something since craft satisfaction tends to be about 50/50 round these parts. The best part is not having invested tons of money, because said blanket has already become the favorite pet nesting spot.  They never let me use it.


Wednesday, December 15, 2010

Grey Salt Millionaire's Shortbread


Buttery shortbread base, slightly salty gooey caramel center and a snappy chocolate topping with a bit of extra grey salt thrown on for good measure.  This recipe takes the delightfulness that is salt caramels and  the utterly enchanting British treat known as Millionaire's Shortbread and combines them.  As Ina Garten would say...how bad can that be?
Speaking of the divine Ms. Garten, I used a variation of her basic shortbread recipe for the crust.  The recipe makes more than is needed for the Millionaire's Shortbread, but this allows you to make the shortbread exactly the thickness you desire and still have dough left over to make "regular 'ole" shortbread later on.  One must always keep shortbread on hand  for teatime and unexpected guests like the Queen.

What can I say about caramel except that it has bested me for years.  Actually it's candy making in general...remember the marshmallow fiasco?  It's okay to shudder, I did.  I like to blame the altitude for all kitchen fiascos--people rarely question that. 


So here it is again, that flippin altitude at work, destroying all candy efforts.  In case the picture doesn't convey the entirety of the debacle--rock solid mass here people.  In the middle of it cooking away on the stove.


So I finally figured I should pay attention to some of the science behind candy making.  There was a time when tempering chocolate had me completely confounded, but a bit of internet research and all has been well since then.  I was sure a bit of time investment researching why my sugar always seized up would pay out in the end....and it did.


Apparently, when they say "do not stir" in recipes, they mean it. I always looked at those lines an recipes and thought "Surely they don't mean it.  If they actually mean it, they would explain in full detail why I'm not allowed to stir." I tend to not do things I'm told unless you can explain to me why I shouldn't.  My parents loved that particular trait. 

As it turns out, reintroducing crystallized sugar into the cooking syrup allows a structural "seed" for the rest of that sugar to cling to and do their scientific crystallization nonsense.  Blah, blah.  Just don't stir.  You will be rewarded with caramel that looks like caramel.  Woohooo.


There are only a handful of cookies that I could endlessly sing the praises of and this is one of them deserving of it's own food group really. There was a trip where we subsisted almost soley on these which only strengthens my food group arguement.  The British have endless variations of this treat, but in the end can you really beat the classic salt  caramel and dark chocolate combination?


Grey Salt Millionaire's Shortbread

Shortbread Ingredients

  • 3/4 pound unsalted butter, at room temperature
  • 1 cup sugar
  • 1 teaspoon pure vanilla extract
  • 3 cups all-purpose flour
  • 1/2 cup cornstarch
  • 1/4 teaspoon salt
Salt Caramel Ingredients 
  • 5 tbsp butter
  • 1 cup heavy cream 
  • 1/2  tsp salt
  • 1/4 c corn syrup
  • 1/4 c water
  • 1 1/2 cup granulated sugar
  • 8 ounces premium chocolate for top

Directions

For the shortbread:
Preheat the oven to 350 degrees  and line 8x8 pan with parchment.

In the bowl of an electric mixer fitted with a paddle attachment, mix together the butter and 1 cup of sugar until they are just combined. Add the vanilla.
In a medium bowl, sift together the flour and salt, then add them to the butter-and-sugar mixture. Mix on low speed until the dough starts to come together.
Press about 1/2 to 2/3 of dough into prepared pan (depending upon your prefernce for shortbread thickness) and refrigerate remainder of the dough for another recipe or baking regular shortbread). Prick with fork.
Bake for 20-25 minutes or until golden on edges. 
Remove from oven and set aside.

For the salt caramel:
In small saucepan combine cream, butter and salt.  Bring to boil stirring occasionaly.  Remove from heat.
In large saucepan, bring sugar, syrup and water to boil over medium low hear.  Cook to 240 degrees.  Swirl but do not stir.
Add cream mixture and cook for 15-25 additional minutes to 220 degrees without stirring. Alternately, drop small amounts of caramel into ice water to cool.  Remove gauge consistency.  This caramel should still be soft and malleable.
Pour caramel over shortbread.  Let cool.
Melt chocolate in double boiler or bowl over boiling water.  Spread over caramel while caramel is still slightly warm.  Sprinkle sea salt over partially hardened chocolate.

Monday, December 13, 2010

Cherry Kisses Shortbread


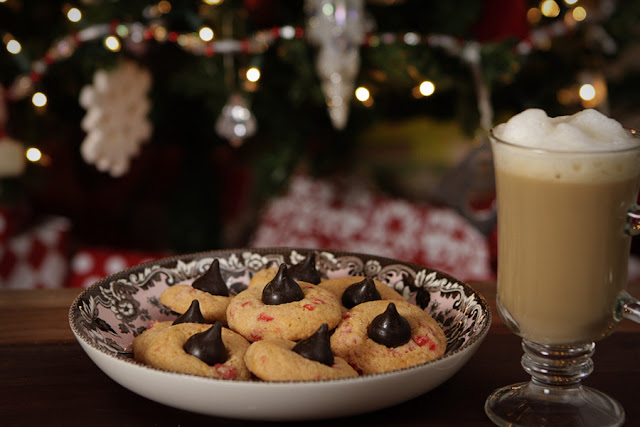
 There's something about a Hershey's Kiss sitting on top of a cookie that screams "Christmas."  While I have always adored these types of cookies from an aesthetic perspective, I struggled with them slightly from a taste perspective....peanut butter, chocolate...any flavor combination, all because Hershey's kisses were milk chocolate.  And while 90 percent of cookies are given away around here, I couldn't bring myself to make dozens of milk chocolate topped kisses because I think milk chocolate is evil and you shouldn't spread evil around during Christmas.  Really now, that's just grinchy. But then I discovered Hershey's made a dark chocolate version and all was well again.

I used to make a chocolate peanut butter version, but a few years ago, a friend found this recipe and asked me to make them for her.  The photo was so pink and pretty--how do you say no to that?  Turns out, the photo was so pink because the original recipe calls for food coloring.  I figure the maraschinos have enough of that and eliminated that part of the recipe.  If you like food coloring though--these are so absolutely delightful looking in pink with a white glittery sugar coating and dark chocolate kiss on top.  And aren't Christmas cookies all about looking delightful?  Maybe someday I'll cave. 


These are essentially a shortbread cookie with a bit of cherry flecks and flavor.  I'll stress that again because the cherry flavor is completely understated--just adding the slightest perfect addition of flavor to already perfect shortbread.


Cherry Kisses Shortbread
  • 1 cup butter (1/2 pound)
  • 1 cup powdered sugar
  • 1 tbsp maraschino cherry juice
  • 1/2 tsp almond extract
  • 1/4 tsp salt
  • 2 1/2 cups unbleached flour
  • 1/2 cup maraschino cherries, drained and chopped
  • 1/4 cup granulated sugar for rolling
  • 25-30 dark chocolate Hershey's chocolate kisses
  1. Cream butter and powdered sugar together, add cherry juice, cherries, almond extract and salt and beat well.
  2. Add flour 1 cup at a time. Scrape bowl. Dough should be stiff
  3. Using a small cookie scoop measure out dough and roll into balls.  Roll each ball in granulated sugar.  Place dough on greased cookie sheets leaving a little room between them to spread.
  4. Bake at 350F degrees for 10-12 minutes.
  5. Remove from oven and immediately place an unwrapped Hershey's chocolate kiss on the top of each cookie, pressing down slightly, not too much.
  6. Let cool completely before storing in an airtight container.
  7. Makes 25-30 cookies.

Sunday, December 12, 2010

Christmas Baking

Christmas cookies round these parts always start with some tried and trues such as these...

and these...


One day off and one drugged and mellow puppy allows for a pretty productive day of baking cookies. I'm kind of thinking cookie baking day should be a recognized holiday. And even better is that just as quickly as all of these cookies were baked, they were out the door.  I'm offically cookie free--granted, it took shoving some extras into each gift box, but checkmark next to the "bake cookies for neighbors and friends"  task.  Yes, it feels pretty awesome. Woohooo.   New cookie recipes to come.


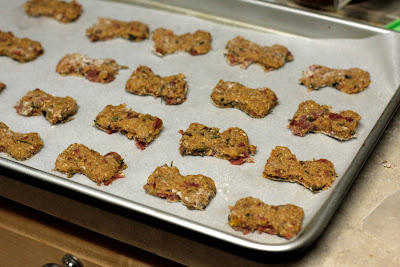
Actually, the one Christmas cookie that didn't make it out the door were these beauties.  There's nothing like liver and kidney cookies to help recuperation and ring in the holidays.


Friday, December 10, 2010

Holiday Lights, Canon Style

Okay, I absolutely copied this setup from a few peeps who posted their own version...but how can you not try? Some people are so very clever.

Wednesday, December 8, 2010

How Unfortunate

I'm a little perplexed as to how I made it so far into the Christmas season without any Christmas photos.  That's so unlike me--especially since the tree has been up for weeks.  Puhhhlease.  Like I have the self control to wait until after Thanksgiving.


I could stare at the tree for hours.  And in my opinion, wrapped presents are even better than opened presents.  I think I'd be perfectly happy wrapping empty boxes and skipping presents so long as the packages all tied up with string could remain forever under the tree.  Presents are to be looked at but never touched...or so I tell the furry ones.  They disagree as they battle for territory under the tree.  But in the end, the presents will prevail, because I said so.


And of course, the other fabulousness that is Christmas is ready to commence: Christmas baking.  I spent a lovely Sunday afternoon with a group baking and decorating sugar cookies, because you have to have sugar cookies.  Just a few pics I took....my cookies are the plain white ones of course.


Baking in this house though is just in the prep phase.  Not sure why, but I like to make the dough first and bake them separately.  Okay, I totally know why--try not to mock me.  See, making dough just makes a huge flour mess all over your kitchen. Isn't it much better to make all the dough, clean up the mess and then bake cookies in a slightly more clean and less messy environment?  Who me?  Type A?

Cookie baking is currently scheduled for Friday.  The youngest one is having a little surgical alteration on Thursday so Friday is Spay recovery and baking Christmas cookie day.  What a lovely combination.


Kind of a small interesting photography tidbit in this photo.  If I told you I shot this last photo with a Canon 50mm prime lens, you could deduce from the bokeh on the tree, which lens was used.  The 50mm F/1.8 has a 5 blade diaphragm which results in a bokeh that looks more pentagon in shape.  The  50mm F/1.4 has 8 blades which results in an octagonal shape and the 50mm f/1.2, well that's an L lens and just has perfectly, delightfully round bokeh. Or so I'm told  This particular photo was shot at  f/4 so the octagon is more apparent.  Opening the aperature up to 1.8 or 1.4 minimizes shape differences slightly and bokeh appears rounder with all lenses.   Kind of nerdy fun knowledge yes?

Wednesday, December 1, 2010

Let The Christmas Baking Commence

Baking Christmas cookies is one of the best aspects of the season. And luckily for me, I have a very bizarre nature that rejects most foods I have in abundance in the house. It's probably that 5 year old mentality that wants what you don't have, but since it allows me to bake cookies galore without actually wanting to eat many of any of them, I'll take it.

Martha Stewart Living, December 2008 Cookie of the Month--Chocolate Peppermint Cookie. I ripped it straight out of my mom's issue (thanks Mom!), brought it home and went to work.

Chocolate and peppermint are a natural match and this cookie is proof: think girl scout cookie and peppermint bark collision. What I especially liked was the suggestion to sift the broken peppermint candies and cover half of the cookies with peppermint "dust" and half with bigger peppermint candies. These cookies might just become a Christmas standard.
Chocolate Peppermint Cookies
Martha Stewart Living Dec. 2008

1 cup all-purpose flour, plus more for surface
1/2 cup unsweetened Dutch-process cocoa powder
1/2 teaspoon baking soda
1/2 teaspoon baking powder
1/2 teaspoon salt
2 1/2 ounces (5 tablespoons) unsalted butter, softened
3/4 cup sugar
1 large egg
1 large egg yolk
3/4 teaspoon pure peppermint extract
8 large candy canes or 30 peppermint candies, crushed
2 pounds white chocolate, coarsely chopped

Preheat oven to 325 degrees. Sift flour, cocoa powder, baking soda, baking powder, and salt into a bowl. Beat butter and sugar with a mixer on medium-high speed for 1 minute. Reduce speed to medium-low, and add egg, then yolk, beating well after each addition. Beat in peppermint extract. Slowly add flour mixture, and beat until just incorporated. Shape dough into 2 disks, wrap each in plastic, and refrigerate until firm, at least 1 hour (or up to 2 days).
Roll out 1 disk of dough on a lightly floured surface to 1/8-inch thickness. Freeze until firm, about 15 minutes. Using a 2-inch round cutter, cut out circles, and place 1 inch apart on parchment-lined baking sheets. Roll and cut scraps once. Freeze cookies until firm, about 15 minutes. Repeat with remaining disk.
Bake until cookies are dry to the touch, about 12 minutes. Transfer parchment, with cookies, to wire racks, and let cool. (Undecorated cookies will keep, covered, for up to 3 days.)
Sift crushed candy, and separate larger pieces from dust, reserving both. Melt chocolate in a heatproof bowl set over a pot of gently simmering water. Remove from heat. Dunk cookies into melted chocolate. Using a fork, turn to coat, let excess drip off, and gently scrape bottom against edge of bowl. Place on parchment-lined baking sheets, and sprinkle 1/4 teaspoon of either candy pieces or dust on top. Repeat, sprinkling half the cookies with pieces and the rest with dust. Refrigerate until set, up to 3 hours. Decorated cookies are best served the same day.