Tuesday, August 28, 2012

Blueberry Pie


Labor Day.  The holiday where we celebrate our roles as workers in the American labor force by well, not laboring.  I love this holiday.  The excitement begins to build as autumn becomes more real.  And of course, just like Memorial Day, Labor Day is another three day weekend where getting away is almost a requirement to me.  

Tomorrow I'm heading to Alaska to visit my friend Mel.  To me, that seems almost adventurous enough.  But really, it's not.  Mel and I are booked for an Alaskan Bear Adventure this holiday weekend.  Yep, yep, we are getting up close and personal with those cuddly bears.  The tour guides fly us on a bush plane right into Katmai into prime bear country and we walk right up to those furry creatures and do a little bro fist knuckle bump.  Some of the photos I've seen from the tour's Facebook page, web page and others who have taken it, show that you get pretty darned close to them....like in the same camera frame close.  Reading about the bear attack in Denali this past weekend where 50 yards was entirely too close and hearing the recommended distance is quarter mile should be enough to deter us, or so you'd think.  But alas, it's not and we are off on a little adventure.  Wish us luck.

Blueberry pie is much sweeter and gentler than bears and a great All-American dessert to celebrate a great All-American end to the summer.  Hope your Labor Days are safe, exciting, fun, and fantastic!

Cheers,
Dances With Bears


Blueberry Pie

Ingredients:
1 Pillsbury Pie Crust 2 pack
2/3 cup sugar
1/2 cup all-purpose flour
1 tsp teaspoon ground cinnamon, if desired
6 cups blueberries
1 tsp lemon zest
1 tsp lemon juice
1 egg with 1 tbsp water beaten together to make egg wash
Large granulated sugar crystals for topping

Directions:
  1. Heat oven to 425°F. 
  2. Unroll one pie crust and place in bottom of pie dish.  Press into crevices if needed. 
  3. In large bowl combine blueberries, sugar, flour, cinnamon and lemon juice and zest.  Mix well. 
  4. Spoon into pastry-lined pie plate.
  5. Cut remaining crust into long strips and weave into lattice top. Fold over at the edges and crimp to seal.  Brush with egg wash and sprinkle with sugar.
  6. Cover edge with 2- to 3-inch strip of foil to prevent excessive browning.
  7. Bake 35 to 45 minutes or until crust is golden brown and juice begins to bubble through top crust, removing foil for last 15 minutes of baking.
  8. Cool on cooling rack at least 2 hours.

Monday, August 27, 2012

Pumpkin Dutch Baby Pancakes with Cream Cheese Drizzle


I know that I should wait until Labor Day before I begin my shift to autumn but being one week early isn't too bad right?  Denver mornings have been deliciously chilly enough to need a fleece and I've seen autumn type flowers at the market.  I needed pumpkin too.

Since my mini cast iron skillets were sitting on the stove, it was a pretty obvious thing to me that I needed to make a pumpkin version of dutch babies.

I turned to my favorite dutch baby recipe and ran it through a couple of trials.  I feared just straight pumpkin would make the batter too heavy to rise, even with less flour, and I was right.  For the second trial I beat the egg whites into stiff peaks and folded it into the rest of the batter that had been blended together.   This allowed the pancakes to rise perfectly in the oven and deflate when pulled out. 


Pumpkin pancakes of course call for a cream cheese drizzle....cream cheese, vanilla, sugar and milk.  Not too shabby.


This is definitely a make again and again type recipe for the fall season.  Extra cream cheese drizzles make it all the better. 


Pumpkin Dutch Babies

4 tsps butter, cut into one tsp slices
2/3 cup flour
3 tablespoons sugar
1/4 teaspoon kosher salt
1 1/4 cup milk
2 large eggs
1 tsp vanilla extract
1/2 cup canned pumpkin
1/2 tsp pumpin pie spice
1/2 tsp cinnamon
2 large egg whites
4 oz cream cheese (1/2 block)
3/4 cup powdered sugar
1 tsp vanilla extract

Directions
  1. Place the flour, sugar, salt, 1 cup of the milk, vanilla, pumpkin, cinnamon and pumpkin pie spice and 2 whole eggs into a blender and process for 30 seconds. Let rest for 1 hour at room temp or overnight in refrigerator. (If refrigerating, allow batter to come to room temp prior to baking)
  2. Preheat oven to 425 degrees. Place 4 individual sized cast iron pans in oven to preheat. (or one 10 inch cast iron skillet)
  3. Beat 2 egg whites with a beater until they form stiff peaks.  Gently fold batter into egg whites until fully combined
  4. Carefully remove hot pans from oven and place 1 tsp of  butter into each.  Swirl to melt.
  5. Carefully pour the batter into the preheated skillet. Sprinkle with half of the fresh raspberries
  6. Bake on the middle rack of the oven for 15-20 minutes or until the edges are puffed and brown.
  7. While dutch babies are baking make cream cheese drizzle by combining cream cheese, powdered sugar, remaining 1/4 cup milk and vanilla in a small saucepan over med-low heat.  Whisk over heat until smooth and serve drizzled over dutch babies. 


Sunday, August 26, 2012

BLT Pasta


I've had this recipe hanging on my fridge for ages.  Yes, tons of cookbooks, Pinterest pins, and Cooking Light and Food Network Magazine subscriptions and I still rip out random recipes and stick them to the fridge.  Go figure. 

This BLT pasta has all of the yummy flavors of BLT minus the mayo which just happens to be my least favorite part anyway.  If you love mayo, I'd say this pasta is so flavorful, you might not even miss it.   If you really wanted to add mayo to the cold version of this salad, you'd probably have pasta salad.

The recipe itself is hardly complicated....boil pasta and chop veggies...but the end product is full of chewy pasta and bacon goodness.  Yep, there's tomatoes and spinach but really it's about the bacon right?

You start off with making some garlic breadcrumbs which is a perfect way to use up the last of that baguette you couldn't resist at the market.   Process until you have fine crumbs.


Heat oil and garlic in pan and then add breadcrumbs and toast. 


 Set aside and grab your other ingredients. Love the substitution of spinach for lettuce. 


I'd show you a photo of the bacon cooking but really, this is a more telling photo of what happens when bacon is cooking in this house.  Puppies need bacon.


Deglaze the pan with white wine before adding tomato paste, vinegar, stock and  a bit of red peppers.  I added quite a bit.


Turn off heat and toss in spinach and tomatoes and toss.  Pretend I mentioned earlier in the post that you should start your water and boil your pasta. 


Add the cooked pasta and crumbled bacon.  Toss and serve.  I threw some breadcrumbs in at this point but really they are best tossed on top of each individual dish of pasta. 


BLT Pasta
adapted from torn out newspaper recipe

Ingredients
1 clove garlic
1 cup french baguette cut into bread cubes
1 teaspoon olive oil
6 strips thick-sliced bacon
1 1/2 c diced tomatoes
2 c fresh spinach leaves
1/4 cup dry white wine
1 tsp red wine vinegar
1/2 cup chicken broth
1/2 teaspoon red pepper flakes
1 tbsp tomato paste
spaghetti, linguine or any pasta really--cooked al dente
salt and pepper to taste

Directions:
  1. Bring a pot of salted water to a boil and cook bucatini according to package instructions.
  2. Mince garlic in a food processor. Add bread cubes, and process until you have crumbs. 
  3. Heat oil in a nonstick skillet over medium; add crumbs and toast until golden, 3 to 4 minutes, stirring often. Season with salt and set aside.
  4. Saute bacon in a large nonstick skillet over medium heat. Cook until crisp, then transfer to a paper towel-lined plate. Pour off all but 1 tablespoon bacon grease.
  5. Deglaze skillet with wine; simmer until liquid is nearly evaporated. Add the broth, vinegar, tomato paste and red pepper flakes. Simmer until liquid is reduced by a third, about 5 minutes.
  6. Add spinach, tomatoes and toss.
  7. Transfer cooked pasta from cooking water to the skillet using tongs. Add crumbled bacon and toss to coat with sauce. Season with salt. 
  8. Sprinkle with bread crumbs prior to serving.


Saturday, August 25, 2012

Wheat Berry Salad with Pineapple and Cranberries


 The first time I tried wheat berries I thought they were just another new grain to experiment with in the kitchen.  I loved their chewy texture and what I assumed could only be their whole grain goodness.  Exotic right?  I was a bit embarassed to realize I couldn't put one and one together.   Turns out wheat berries are just the  whole grain form of wheat before any processing occurs.  Duh right? They look like thick, short grains — similar to brown rice and they're packed with fiber and goodness since the wheat still retains the germ and bran and other goodness.  

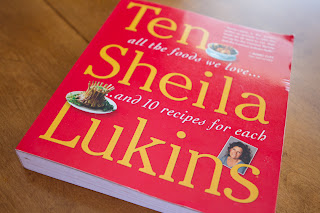
Ten by Sheila Lukins is a fun concept for a cookbook. Lukins (author of the Silver Palate Cookbook) compiles what she considers to be the 10 best recipes in various categories including dips, veggie soups, roasts, steaks, burgers, ribs, chicken, stews, fish, leafy salads, vegetables, pastas, grains etc.  There is even a category specifically dedicated to corn and to asparagus--10 asparagus recipes is happiness indeed.  The pictures are few and far between which makes it hard to pick up unless you are in a "reading" mood rather than a "browsing" mood but the recipes I've made so far have all been pretty fantastic.  

This recipe combines the chewiness of the wheat berry with the sweetness of pineapple and cranberries and the clean flavors of cukes and parsley.  I say that because it sounds like something I should say but confession time....I do not think parsley tastes clean or good.  I feel guilty because you always see cooks throwing fresh parsley on everything.  It's kind of required if you cook it seems.  

When I make this again, I'd opt for a bit of mint and a little bit of green onion to balance the sweetness. I adapted the recipe by reducing the sweetness (pineapple and cranberries) and increasing the cukes and wheat berries a bit. It was still a little sweet for me.  I think the green onion would add the perfect counter to the sweetness.

Parsley is lovely to look at though. 


Wheat Berry Salad with Pineapple and Cranberries
Adapted from Ten by Sheila Lukins

Ingredients:
1 1/2 c wheat berries
1/2 tsp salt
1 1/2 cup diced hothouse cucumber
3/4 cup diced pineapple
1/2 cup chopped dried cranberries
2 tbsp chopped parsley
3 tbsp olive oil
3 tbsp lemon juice
salt and pepper to taste
Lettuce for serving

Directions:
  1. Rinse wheat berries in colander.  Drain and add to a large bowl and cover with cold water by at least a couple of inches.  Let soak overnight. 
  2. Drain wheat berries in colander thoroughly.  Transfer to a large pot, cover with water by three inches and bring to a boil.  Reduce heat and simmer, partially covered until wheat berries begin to soften, about 15 minutes. 
  3. Add a 1/2 tsp salt, and cook uncovered until tender, about 45 minutes. Drain in colander and rinse with  cold water.  Let drain thoroughly.
  4. Add pineapple, cukes, cranberries and wheat berries to a large bowl. 
  5. Whisk together lemon juice, olive oil and parsley and drizzle over wheat berries bowl.  Season with salt and pepper.  Toss and let stand for 20 mins at room temp before serving on a bed of lettuce. 


Tuesday, August 21, 2012

Green Chile Chicken Enchiladas


Is it true that farmer's market season will soon be over?  I'm enjoying the produce hoarding while it lasts.  Every week I head over and pick up my juicy Palisades peaches, fresh sweet corn on the cob and of course, now that they are in season, fresh roasted Hatch green chiles. 

Except.

Yes, except that this past weekend  the line for the chiles was atrocious and they couldn't roast them to keep up--Coloradans love their fire roasted Hatch chiles it seems.  The options were to either skip green chiles for a week or figure out another plan.  Since going without chiles even one week wasn't really a true option at any point, I picked some up at the grocery store and tried this roasting business myself. 


I'm fairly embarrassed to admit it was so very easy.  Super simple easy.  Super deduper easy.  My whole life I've labored under the conviction that chiles had to be roasted by those super cool guys who put them in the large cylindrical bingo cage and spin them while they roast.  

But alas, these can be done at home.

Throw them on a grill preheated to high and just toss them around every couple of minutes.  Literally.  No oiling them, no laying them evenly across the grates.  Grab a pair of tongs and toss, toss, toss.   Remove when charred and place in plastic bag.  Tie tight and let steam so peels will slide right off. 


When the chiles are cool you can slide the skins off, remove the stem and seeds and rinse to clean.  Then you just dice them up.  The hardest part by far is the cleaning and you still have to do that with the roasted ones you buy at the market.  Even better is the cost savings--roasted chiles at the farmer's market are $3.50/lb.  Home roasted chiles are $.99/lb.  I'll still end up supporting the man that spins them at the market because I always want him to be there happily spinning and fragrancing the air with roasted chile goodness, but $.99/lb is the kind you buy to dice up and store in baggies in the freezer for your winter green chile feasts. 


When you buy chiles each week though, it becomes a challenge as to what to make next.  I've made omelets, chicken green chili, green chile tortilla soup, quesadillas, and about a zillion other things I could think of.  This weekend I was craving enchiladas.  

I threw some chicken on the grill, shredded it up and mixed it with diced chiles, grated cheese and a bit of enchilada sauce.  Roll filling inside of a corn tortilla....


Gratuitious Boston Terrier shot. 


Pour enchilada sauce into bottom of baking dish, add enchiladas and top with enchilada sauce and some more green chiles because these are green chile enchiladas.  You might opt for the medium or mild chiles if the spice level is a bit higher than your taste buds like.  I used hot chiles and these were on fire.  In that delicious green chile way of course. 


Top with more cheese


Bake for 20 minutes and serve.   I'd never had green chile enchiladas before they are a little reminiscent of chili rellenos.  How bad can that be right?


Green Chile Chicken Enchiladas

Ingredients:
3 cups shredded chicken
1 1/2 cups dice green chiles
2 cups shredded cheese
1 can (28 oz) green chile enchilada sauce
corn tortillas (room temp)

Directions:
  1. Preheat oven to 325
  2. In a large bowl, mix together shredded chicken, 1 cup green chiles and 1 cup of the shredded cheese.  
  3. Add 3/4 cup of the enchilada sauce and mix well
  4. Spread 1 cup enchilada sauce across the bottom of an 11x7(ish) baking dish
  5. Spread a heaping spoonful of chicken filling down the center of a tortilla.  Roll sides up and place seam side down in prepared baking dish.  Repeat until all filling is gone. 
  6. Top with 1 cup of sauce and remaining 1/2 cup of green chiles.  Sprinkle remaining cheese over top
  7. Cover with foil and bake for 20-25 minutes or until heated through and cheese is bubbling. 

Sunday, August 19, 2012

Chocolate Zucchini Loaf


I have a friend at work who used to bring me these zucchinis from her garden.  Now that I'm back at this job, I walked into my office the other day and found a zucchini on my table.  I gratefully accepted because who doesn't love home grown produce?  

This one was a little on the bigger(enormous really) side so while a I grilled a few slices, the rest went into the food processor for shredding and became an obviously super healthy vegetable chocolate loaf.  Okay so while not the healthiest food out there,  there was gobs of zucchini and just a bit of sugar in the loaf.  

I love that you can still see streaks of green in the loaf. Chocolate + zucchini = summer happiness.


Chocolate Zucchini Loaf

Ingredients:
1/4 c canola oil
1/4 c greek yogurt
1/2 c packed brown sugar
1 tsp vanilla extract
2 eggs
1 1/2 c shredded zucchini
1/2 c whole wheat flour
1/2 c all purpose flour
1/2 c unsweetened cocoa powder
1 tsp baking powder
1/2 tsp baking soda
pinch of salt
1/2 c mini chocolate chips (or regular)

Directions:
  1. In a mixer, combine oil, yogurt, sugars and vanilla. 
  2. Mix in eggs one at a time and then add shredded zucchini. 
  3. In a separate bowl, whisk together flours, cocoa, salt, baking soda and baking powder. 
  4. Slowly add this dry mixture into your wet mixture. 
  5. Mix until just combined. 
  6. Stir in chocolate chips.
  7. Pour batter into a greased 9x5x3 loaf pan, and bake at 350 degrees for 50-65 minutes, or until done

Tuesday, August 14, 2012

Grilled Peaches and RolyPoly Cake


Hopefully you've all had your share of grilled veggies and fruit this summer because grilled produce is awesome.  Some of my favorite grilled fruits are our Colorado colossal super fantastic Palisades peaches that I pick up EVERY weekend at the local farmers markets when peaches are in season.  They are phenomenal all by themselves but when you need a little variety because you've been eating peaches nonstop for weeks, throwing them on the grill is a great way to mix it up.  I've been using the Tyler Florence "recipe" I posted eons ago--a drizzle of oil and some fresh rosemary.  A few minutes per side on a medium high grill and voila, you are good to go. 

The same recipe can be turned into a nice clean summery dessert with a little help from greek yogurt. Of course, this recipe works without the rosemary--I just fell in love with the peach and rosemary combo so always throw them together if I'm grilling peaches.  I served these after the Tandoori chicken I made so thought it would be nice to incorporate a little eastern flavor into the dessert as well......mmmmm cardamom and honey.

For the yogurt you simply mix 1/4 tsp finely ground cardamom(or you could use cinnamon) and 1 tsp vanilla extract into 2 cups of greek yogurt.  I tend to like my food less sweet so I opted for no honey in the yogurt itself, but if you are sugar peeps, drizzle a big glob of honey into the yogurt.  Mix well, and spoon onto warm grilled peaches  Drizzle with honey and serve.


A little Peanut turned not so little this year...5!!! Oh I'm so weepy.  And again, instead of humoring her aunt with a princessy girly cake, she's decided to love bugs...rolypolys in particular.  Since I'm a believer in encouraging what people love, I thought a rolypoly cake might be fun....that is until I realized that no one in all of internet land had ever posted a photo of a rolypoly cake they'd made.  Or at least I couldn't find one.  Crikey.  Turns out it wasn't so hard with a little chocolate fondant and a loaf cake.  

Yes, the cakes are getting lazier over the years.  I might just stick a candle in a Sara Lee pound cake and call it good next year.  Just kidding Peanut. 


Happy Birthday little Peanut.  You are this auntie's favorite 5 year old superhero. 


Puppies always know how to get in on the action.


Sunday, August 12, 2012

Grilled Tandoori Chicken Kabobs


The longer you go between posts, the harder it is to get back to blogging.  I have to admit to loving a little break over the summer.  Work has been exhausting, weather has been dreadfully hot and I've been lazy.  I'm sure the three are inextricably tied together. 

But alas, I fired up the grill and cooked up some indian fare.  I'm pretty sure I don't cook indian nearly often enough.  I saw a bazillion great looking recipes online and on Pinterest, but in the end, I need to justify my unnecessary cookbook collection so I grabbed American Masala off my bookshelf.  Every time I make something from a cookbook I wish I had more time (or the dedication required) to crack them open more and experiment with all of the recipes. 


This recipe for tandoori chicken taught me that tandoori chicken is not naturally colored red.  Shocking right?  You could add red food coloring if the red is important to you.  I also thought this version was pretty fascinating in that it was one of the few I've seen that included an onion (blitzed completely in the food processor) as a major marinade ingredient.  

All in all, it was fantastic and as it turns out, chopped cold tandoori chicken is also pretty tasty thrown on top of a regular 'ole green salad for lunch the next day. Definitely a recipe keeper. 


Grilled Tandoori Chicken Kabobs
adapted from American Masala by Suvir Saran

For the chicken:
2 tbsp lemon juice
1 tsp salt
1/2 tsp turmeric
1 tbsp paprika
3 large chicken breasts (about 2.5 lbs) cubed into 1 inch pieces
Mix spices spices and lemon juice together in a large bowl.  Add chicken.  Stir and let sit for 30 minutes in refrigerator.

For Marinade:
1 small red onion, roughly chopped
4 large garlic cloves peeled and smashed
1 tablespoon chopped fresh ginger
1/2 cup greek yogurt
3 tbsp tomato paste
1 tsp ground coriander
1 tsp ground cumin
1 tsp ground black pepper
1 teaspoon garam masala
pinch of cinnamon
1/2 tsp cardamom (optional)
¼-½ teaspoon cayenne pepper (depending on how spicy you like it)
1 teaspoon sweet paprika
Place marinade ingredients into food processor and pulse until smooth.  Pour over chicken and let marinate in fridge for 8 hours or overnight

To prepare chicken, soak skewers in water for 30 minutes
Heat grill to medium-high
Thread chicken onto skewers
Grill for 10 minutes until chicken is cooked through, turning halfway through