Sunday, May 29, 2011

Red Velvet Pancakes

 
Happy Memorial Day to all...hope everyone is enjoying their three day weekend!!  Last year, I spent Memorial Day weekend in Las Vegas visiting my sister...this year...well kind of the same. :) We are taking it easy in this house with a bit of quilting, crocheting, knitting, and baking.  Add a pile of books and it's all about vegging out.  I'm completely unapologetic.
 
Making some "lazy" pancakes for the weekend is as easy as opening a box of Red Velvet cake mix. I had to experiment a bit because the first batch came out a bit flat..but with some baking powder and flour, all was well. Throw in a couple of plain white buttermilk pancakes and you have a perfect Memorial day brekkie.  It would have been spectacular to top the red and white pancakes with some blueberries, but alas, there were none to be found in this refrigerator. 
 
Red Velvet Cake Mix Pancakes
 
1/2 box Duncan Hines Red Velvet pancakes
2/3 cup all purpose flour
2 tsp baking powder
2 eggs
1/3 cup oil
1 1/4- 1 1/2 cups water
  1. Combine ingredients and whisk well.   Add additional water if batter is too thick--batter should be same consistency as tradtional pancake batter.
  2. Preheat pan or griddle on med-high heat (or 325 degrees on griddle).
  3. Pour batter onto griddle and let cook until bubbles form on top, about 3-4 minutes. Flip and cook for 2 minutes more.
  4. Serve with maple syrup or fresh berries.

Wednesday, May 25, 2011

Nekkie Burrito Bowls


Has anyone else noticed that blogger isn't quite fixed all the way or is it me?  I can't log out without completely clearing my cookies and history (ick) and I can't leave a comment on your blog if it doesn't have a pop up window with my sign in intact. 

So, aside from asian food, this may be my most often prepared meal.  And purchased meal.  I find that one of the best controls I have over my daily eating is ensuring I pack a lunch from home each day.  Sometimes though, between juggling my coffee, laptop bag, purse and Brooklyn's "lunch" on the way out the door each morning, I leave my lunch in the refrigerator, or even on the counter.  Those are the days I usually end up at Chipotle....love, love, love their Naked Chicken Burritos.  What's even better is how very simple this is to prepare at home and there are always leftovers in this house.  Yay!

While it initially seems like a bit of work because there's a few different prep areas, it actually all comes together rather quickly with a bit of prep the night before or morning of. I usually season the chicken the night before I'll make this (and I butterfly it so it'll cook faster and have more surface area for the spices, but you don't have to).  Then to get it all going, I start the rice, put the chicken on the grill and prepare the salsa while the rice and chicken cook.  The beans are so easy, they don't even count as preparation.


 I usually just combine the corn salsa and the tomato salsa from sheer laziness but if you don't like the corn, just leave it out.  As it turns out, last night after I made this and settled on the couch with my latest Food Network magazine, I saw that their copycat recipe fo the month was for Chipotle's corn salsa--definitely giving that a try next time.

Then you just serve it all up on the table family style.  This is always popular with guests other than my sister--everyone can create the exact burrito bowl they want.  And if you don't like your burritos naked, just layer all of these into a large tortilla and roll it up. Even though I just had it last night, I swear I could it eat it again now for breakfast. 


Naked Burrito

Corn Salsa
  • 1 cup fresh corn cooked and cut from cob, or frozen corn defrosted in warm water and drained
  • 3 large tomatoes, diced
  • 1 jalapeno (optional) seeds removed and finely minced
  • 1/4 finely diced red onion
  • 2 garlic cloves, minced
  • 1/4 cup chopped cilantro
  • salt to taste
  • juice of 1 lime
Combine all ingredients and set aside

Cilantro Rice
  • cups of hot cooked rice
  • juice and zest of 1 small lime
  • 1/2 cup of chopped fresh cilantro
  • 1/2 teaspoon salt

Mix lime juice with salt to dissolve salt.  Drizzle over rice.  Add zest and cilantro and toss.

Black Beans
  • 1 can of black beans, rinsed and drained
  • 1/4 cup chicken broth
  • 1 tsp garlic powder
Add garlic powder to chicken broth and stir.  Add beans, cover loosely and microwave for 2-3 minutes

Blackened Chipotle Chicken
  • 2 large chicken breasts, butterflied
  • blackening spice
  • powdered chipotle chilis
Generously sprinkle chicken with blackening spice and chipotle chili powder.  Refrigerate for at least 2 hours.  Heat grill to 450.  Place chicken on grill and cook for 7-9 minutes on each side.  Let cool for 5 minutes and then dice.

Optional Toppings
  • hot sauce
  • avocados or guacamole
  • sour cream or greek yogurt
  • shredded jack or cheddar
  • tortilla chips

Monday, May 23, 2011

Cookbook #74 Local Breads; Pretzel Rolls


I would like to say I haven't been using my cookbooks because I'd left them all packed up while I am living in the apartment for 6 months, but that would be a lie.  All cookbooks are unpacked and stare accusingly at me each day.  I haven't been using my cookbooks because I've been a bit lazy to look through the books, make a list and ensure I have the ingredients.  Meal planning is definitely half of the cooking/baking scenario.

I've only taken one cruise in my life and can't say that I was all that enthralled with it.  I loved those shore days and the variety of ports--I never would have visited Belize or Honduras if not on a cruise.  But the ship days?  Not so much.  I admire those who can sit relaxed in the sun, reading and soaking up those rays.  I am both hot and bored in about 4.5 minutes.  After my 4 minutes were up, I was off in search of my favorite cruise treat...pretzel rolls.  Seriously, I ate an outrageous amount of these on the cruise.  I don't remember any of the other food all that much--it was all pretzel rolls, all the time. When I saw this recipe for pretzel rolls in my Local Breads cookbook, it was a no brainer.


I'll be honest and admit that I'm not sure why I own multiple bread cookbooks.  The layout and format of this is similar to the Bread Bible.  The pictures are congregated in little photo sections interspersed throughout the book, and the recipes are similar to other bread books--sourdough, raisin bread, rye, etc.  But, it did have pretzel rolls so it's now near and dear to my heart.


I am a huge advocate of using the kitchenaid dough hook to knead dough and this cookbook gives you directions for both hand and kitchenaid prep.  When making pretzels is as easy as measuring out a few ingredients and turning on the mixer, they are much more likely to come out of my oven more often.  I substituted whole wheat pastry flour for no other reason than it somehow got mixed in with my regular flour. 


The secret for that chewy pretzel exterior is to boil the dough for a minute or two--similar to the bagel making process. This recipe called for 1/3 cup of baking soda added to the boiling water just prior to adding the pretzel rolls.  You'll want to add it very slowly as the water does some crazy boiling up as you add it.


Then you just top it with salt and pop into the oven for about half an hour.  What surprised me was how much easier these were to make than bread.  There are not multiple rising steps and I've read reviews where some didn't even let the dough rise the first time--they just shaped these into rolls and boiled right away.   The only thing I would add is a slit or x-cut across the top right before baking.  I had one or two that popped on the bottom during the baking.


And while they made delightful little pretzel rolls similar to the ones I was carrying around with me throughout the cruise (seriously), they also make a phenomenal chewy pretzel bun for a turkey slider. I give the whole cookbook a thumbs up just for this recipe.


Pretzel Rolls
from Local Breads by Daniel Leader


  • 3 3/4-4 cups unbleached bread flour


  • 3 tablespoons unsalted butter, chilled, cut into 1/4 inch pieces


  • 1 1/4 cups warm water(70-78 degrees)


  • 1 teaspoon instant yeast


  • 2 1/4 teaspoons fine sea salt


  • 1/3 cup baking soda (for boiling the rolls)


  • kosher salt (for topping) (optional)


    1. Place the flour in the bowl of a stand mixer. Using the paddle attachment stir in the butter on low speed until it is evenly distributed and the texture of coarse cornmeal, 1-2 minutes.
    2. Pour in the water and sprinkle on the yeast and salt. Switch to the dough hook and knead on medium until very smooth and pliable, about 8-10 minutes.
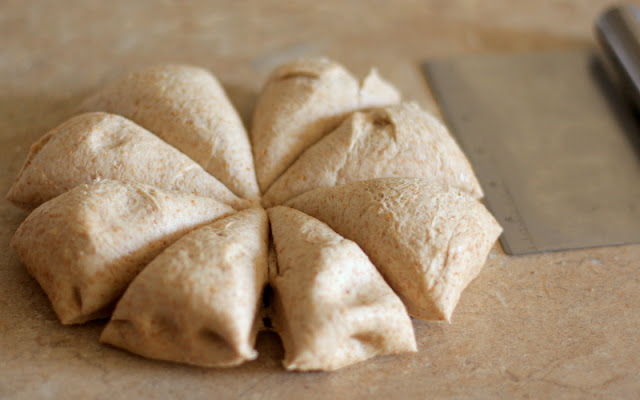
    3. Shape the dough into a ball and place in a large well oiled bowl. Cover the bowl with plastic wrap and let stand in a warm place, (70-75 degrees) for about 1 hour until it has slightly expanded and risen to a dome. Lightly oil a baking sheet, Turn the dough out onto an unfloured countertop and pat into a rough rectangle. Cut the dough into 8 equal pieces. At this point you can shape the dough into either pretzels or rolls.
    4. Arrange the rolls on the baking sheet at least 1 inch apart and cover with plastic wrap.
    5. Place the baking sheet in the refrigerator for 2-24 hours.The dough will not necessarily rise while refrigerated, but it helps them to hold their shape while handling.
    6. Preheat oven to 350 degrees F.
    7. Bring 4 quarts of water to a boil in a wide 6 quart kettle,  Add the baking soda slowly, (The water will bubble like crazy when you add the baking soda). Turn the heat down to a healthy simmer.
    8.  Add the rolls 1 at a time to the boiling water and allow each roll to rise to the surface before adding the next one. After each roll has risen to the surface, let cook for about 20 seconds and then flip over with a slotted spoon and cook the other side for 20 seconds.
    9. Remove the rolls from the water with a slotted spoon, draining them well and place on a freshly oiled baking sheet. Repeat until all rolls have been boiled. Sprinkle the rolls with salt or seeds if desired and place the baking sheet in the oven for 30-35 minutes.
    10. When nicely browned remove the rolls from the oven to a cooling rack and let cool at least 10 minutes.

    Sunday, May 15, 2011

    Tart Frozen Yogurt


    Oh, frozen yogurt.  Yum.  While I'm usually not a "scooped" ice cream kind of girl, I do love soft serve.  I  think it's nostalgic really...childhood summers and Dairy Queen. It goes with the fireflies and summers in Iowa nostalgia I suppose--I still swear that DQ has the best Ice Milk product out there.  Frozen yogurt is right up there on my soft serve love list-- a love like this could get a bit spendy.  While it doesn't really sound too bad at $.44 an ounce, it would be comparable to paying over $2.50 for each of those individual 6oz yogurts at the grocery store.  Crazy.  

    I've made froyo before, but I usually add in fruit or chocolate or other goodies.  In that form, it kind of becomes similar to ice cream.  Tasty, but it just sits in my freezer.  I wanted something clean and tart and just like the kind I grab at the local froyo shops.   I'm a bit embarrassed to see that making it at home is about as easy as it comes.  The only thing missing is that slightly grainy texture(which I love) that the shops have.  That aside, this is pretty comparably tasty and the ingredient "list" is hardly a list at all...yogurt, sugar and vanilla. 

    I used one 2 lb tub of whole milk yogurt drained overnight.  Once drained, about this much yogurt remains...


    Mix in 1/2 cup sugar (or more per your taste preference) and a tsp vanilla.  Pop it into your ice cream maker for 15-20 mins...

    As you can see, I wrote down this very complicated recipe just in case I needed it for the blog post and forgot...
    
    And then magically you have this. 


    While it looks like a solid mass here, it's actually the perfect soft serve consistency--you can freeze it up for a bit if you like a firmer yogurt.  I topped it with some fresh strawberries with a tsp of sugar mixed in and I swear, this was better than any ice cream sundae.  When you think about it, these are the same ingredients in your everyday individual yogurt cups, but when deconstructed and frozen, it's like eating a soft serve sundae.  I love that.  I do have to say that the whole milk yogurt though makes for a super creamy, almost ice cream like, frozen yogurt. It was almost a bit too rich for me so I actually have some lowfat yogurt draining away for my next batch. 


    On another front, finally, after a whole lot of this...


    I have this. I'm actually in shock at how quickly a quilt can be put together.  It's all relative I know, but when knitting or crocheting an afghan takes months or up to a year, a few hours over a couple of weekends seems like nothing. Next weekend I'll attempt the quilting.  I first learned to quilt from a friend who swore that hand quilting was the only way to make a quilt and so I always feel a bit of trepidation right before machine quilting.  Okay, that's a lie.  I feel an immense amount of trepidation and fear before machine quilting since I've puckered many a quilt. It's all about the layering and pinning technique right?  Wish me luck. :)

    Friday, May 13, 2011

    Hexagon Granny Blanket


    With Blogger losing half my comments from my last post, there were a few people I didn't get to respond to--I meant to, I really did.    What I do recall from the ones that are there and the lost ones I read before google sent them into oblivion, is that there were a lot of questions about the Hexagon Granny Blanket.  I wish I could take credit for the cleverness that is the Hexagon Granny Blanket, but alas, I just followed a pattern. I did blog about it here,  but the actual tutorial is over at Attic 24 and it's a phenomenal one.  Lucy takes you step by step through the entire hexagon--I printed it out and kept it right by my side for the first few hexagons.  After you memorize the pattern, it's the perfect project to sit down to a movie with as it's pretty brainless after that. Lucy also has the most amazing crochet blanket collection...don't you just love all the bright cheery colors in her blanket fest post?  Have to admit that I've already started a bag of yarn to make the Japanese Flower blanket, that is in between the blanket I'm knitting and the quilt I'm making.  Yes I know I live in Las Vegas now and the weather is already in the high 90s.  I'll turn the A/C up.


     What I especially love about these granny type blankets that are created in pieces, is that they can also be deconstructed in pieces.  I love the colors in this final version but the blanket didn't actually always look this way.

    Once upon a time, before I started buying "scrap yarn" (ridiculous I know), the blanket had some hexagons that I did not feel a deep connection to.  Every time I looked at the blanket, I would fixate on the neon orange, shiny lemon yellow and electric green hexagons.  The genius of this construction is that it just takes a few snips, and you can extract the hexagons that just are not jiving with the rest of the blanket.


    Replacing them is just as easy as crocheting up the new ones and then using the same attaching stitches you use for the entire blanket.  While it's a bit time consuming overall, the fact that it's created in such small and manageable pieces makes it a pretty easy and feasible project for anyone. Give it a try--you'll be glad you did. 


    And isn't he a cute little guy?


    Happy Friday all!  (No work tomorrow...yipppppppeeeeee!!!!)

    Wednesday, May 4, 2011

    Heather Bailey, Cinco de Mayo and other Ramblings


    I meant to make something creative and fabulous to post for Cinco de Mayo, but I just had a complete block.  No matter how hard I tried--I wasn't inspired.  Booooooo.  Gena over at Blubonnet in Beantown however, has a very clever and delightfully splendid Cinco de Mayo recipe for Mexican Quinoa Loaf with Roasted Tomatilla Salsa that I cannot wait to try.  It's just that intriguing.

    Instead of Cinco de Mayo deliciousness I present to you, the fabulous deliciousness that is Heather Bailey fabrics.


    My friend Leslie made the cutest little quilt from the Tanya Whelan's Delilah fabrics for her own little Delilah, and it reminded me of summers in Iowa, icy lemonade, the sound of cicadas and lightening bugs lighting up the sky.  Seriously, it actually did.  I figured that fabric like that had to come live at my house...it would be my own "Summers in Iowa" quilt.   Wouldn't you know it...the charm packs for that fabric line are no longer available.  Since my quilt has to have the exact same fabrics as Leslie's quilt in order for my OCD to be satisfied, I put it off for my next quilt...so I have time to study Leslie's quilt in detail.

    With Summers in Iowa being moved to a 'deferred' status, I headed to this new fabric shop, Sew Obsessed that just opened here a couple of months ago.   I say "just" kind of like I've lived here longer than a few weeks myself eh? What's so exciting about this store is their collection of Amy Butler and Heather Bailey...in stock!  To some that may not seem like much, but I've been in waaaay too many stores where the only fabric I could find were the more traditional quilting calicos.   And what's better than a store that stocks Amy Butler and Heather Bailey?  Why hearing the words, "I have about 200 more bolts coming soon..."  More Amy Butler?  More Heather Bailey?  More other fun fabrics? Yes please.  If you live in Vegas, know that such places do exist...right over in Henderson. Henderson...what a magical  kind of place.

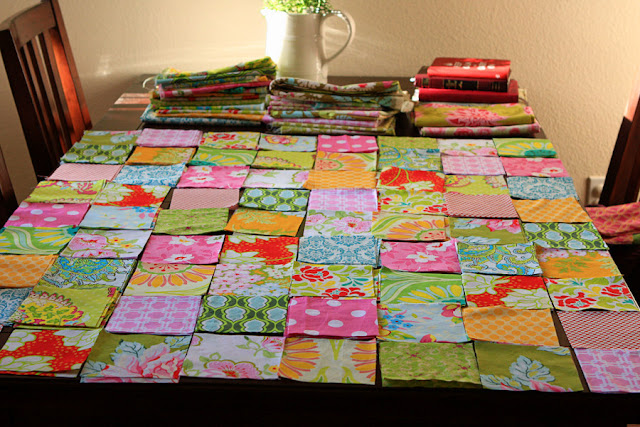
    So Heather Bailey Pop Garden and Smiley Jane fabrics came home with me, were promptly laundered and cut and now sit patiently waiting for the sewing extravaganza to begin this weekend.  After piling over 300 squares though, I'm thinking I might have considered a bit of strip quilting...individual blocks is going to make for a lot of sewing...


    Hopefully quilt does not go the way of the tangerine margaritas I was going to make you.  This is as far as I made it....Happy Cinco de Mayo. ;)