Saturday, March 31, 2012

Strawberry Cheesecake Pancakes


It seems like pancakes have become a culinary canvas for creativity recently.  When we were growing up, my mom made plain pancakes, with some Mrs. Buttersworth drizzled on top.  Or rather only sometimes when we begged and whined and the Mrs. Buttersworth was on sale would we get it, but mostly it was the generic syrup.  The generic bottles of syrup never talked to you the way Mrs. Buttersworth promised to in the commercials.

Recently though, pancakes really have become this blank canvas just awaiting pineapple upside-down topping, carrots ala carrot cake, sweet potato praline or oreos (really saw those in a restaurant) or whatever combo one can think up.  I wish I'd thought up this cheesecake idea but I saw it in one of last year's still un-perused issues of Food Network Magazine.  Unpacking around here over the past week has gone a little like this....unpack a box, find an unread magazine, read magazine, notice with disgust that guest room and basement are filled with unpacked boxes.

Food Network does a copycat recipe each month and I believe these were from iHOP or someplace similar. I debated for the longest time on whether to make the pancakes first or try stuffing the cheesecake inside a slice of french toast before dipping and cooking.  Cheesecake french toast sounds pretty fabu too right?

I like to prep the strawberries a good hour before so they have time to make all of that juicy strawberry sauce.  One lb of strawberries diced and 3 tbsp of sugar sprinkled.  Stir and refrigerate. 


As I'm sure we all know, pancakes are about as easy a meal as they come and I bet these could even be made with pancake mix instead of homemade pancakes if desired.  I bought a Sara Lee Cheesecake, diced it into little pieces and then froze it again just to make sure it was nice and frozen before cooking it inside the pancakes.


Then you just stir the frozen cheesecake directly into the prepared pancake batter. 


And cook them up on the griddle like any ordinary pancake recipe.  But these are definitely not ordinary.  Oh no.


Top with butter and strawberries.  These were every bit as fabulous as you'd imagine cheesecake pancakes would be.  


Strawberry Cheesecake Pancakes

Ingredients

1 lb strawberries, washed and sliced
3 tbsp sugar

For the pancakes:
1 1/2 cups all-purpose flour
2 tbsp white sugar
1 1/2 tsp baking powder
1 1/2 tsp baking soda
1/2 teaspoon salt
2 c buttermilk
2 eggs
2 tbsp melted butter
2 cups frozen cheesecake, diced

Directions
  1. Combine sliced strawberries and sugar, mix and refrigerate for at least an hour
  2. In a large bowl, combine flour, sugar, baking powder, baking soda, and salt. 
  3. In a separate bowl, beat together buttermilk, milk, eggs and melted butter. 
  4. Add wet ingredients to dry and mix taking care to not over mix.  Allow batter to hydrate for 15 mins.
  5. Heat a lightly oiled griddle or frying pan over medium high heat (or 350-375 on electric griddle)
  6. Pour or scoop the batter onto the griddle, using approximately 1/2 cup for each pancake. Cook until bubbles form and begin to pop around edges.  
  7. Flip and cook until golden on other side
  8. Serve the pancakes topped with the strawberry sauce; top with butter and whipped cream, if desired.

Thursday, March 29, 2012

Grilled Blackened Cedar Plank Salmon


Did you know dinner could be so easy?  Coating a beautiful piece of salmon with blackening spice and throwing it on the grill takes about 15 minutes from start to finish and tastes out of this world delish,  if you are a salmon fan that is.  And even if you are not, you might be convinced to convert.  Blackening spice gives the salmon tons of flavors and grilling it on a cedar plank  imparts even more smoky woodsy flavor.


I've always been a huge fan of grilling because it adds so much flavor with very little mess. When I lived in NY, I grilled 3-4 times a week, even in the winter.  Lighting a gas grill is just as easy as turning on the stove and while you do have to step outside into the cold for a few minutes, not having to clean pots and pans was so worth it to me.  When I bought my condo, I wasn't allowed to have a grill because my patio was enclosed.  Now, with the opportunity to grill in front of me again, Tess is one of the first things I purchased.  Isn't she lovely?


I've had Tess (because all grills need names) for just a couple of weeks and I'm pretty sure I've grilled at least every other day. I love Tess, even more than, get this......my other KitchenAid, the beast that sits in the kitchen. I know that seems wrong to so many and I do actually feel a little guilt over it.

I opted for the two burner grill because I am one person and the grill is supposed to be big enough to grill 28 hamburgers.  Who needs to grill 28 hamburgers except people with begging Boston Terriers?  If I had to do it again, I might go with the bigger one. While I may only need enough space for one hamburger for hamburger needing pups, it gets a little crowded when you try to throw veggies and protein and puppy treats all onto the same grill. 


So the salmon.  Easy peasy as soaking the untreated cedar wood for at least an hour (you can buy untreated wood at Home Depot for less but I find Crate and Barrel much less intimidating than Home Depot.)  You then rub the salmon with the blackening spice, throw it skin side down on the wet plank and throw it on a med-high grill for 12-15 mins or until the salmon is opaque and flaky. Have water bottle handy in case the plank dries out and wants to flare up.  Seriously, blackened salmon is good stuff and it's just as outstanding cold and thrown into a salad the next day.


With some grilled veggies (drizzled in olive oil and sprinkled with salt, pepper and garlic flakes) you have an entire meal and no pans to clean.  Love, love, love that.


Grilled Blackened Cedar Plank Salmon

Blackening Spice:
2 tsp dried basil crushed fine
1 tsp dried thyme crushed fine
1 tsp dried oregano crushed fine
2 tbsp garlic power
2 tbsp ground black pepper
1 tbsp smoked paprika
1 tbsp brown sugar
1 tbsp salt
1 tbsp onion powder
2 tbsps cayenne pepper
Mix together and store in small spice jar

For Salmon: 
1 1lb salmon fillet
blackening spice
cedar plank soaked in water for at least 1 hour
Directions
Heat grill to medium high
Place the plank with salmon on the grill and cook, covered, until the salmon is opaque and flakes easily, 12 to 15 minutes

Wednesday, March 28, 2012

Buffalo Chicken Quinoa Loaf


I am a huge fan of buffalo wings, sans the wings.  Kind of like loving a great reuben sandwich...without the thousand island dressing or the corned beef.   It's not really possible I know but humor me. 

I've been on a  buffalo chicken kick recently and this loaf was a welcome diversion from the fried boneless "wings" at Buffalo Wild Wings.  Yes, I probably ruined it if what you love is fatty fried crispy crunchy boneless wing goodness.  But I do love the fatty fried crispy crunch boneless wings and I still think this loaf was pretty darned good.  The quinoa actually adds a little crunch to the loaf and the chicken is full of the buffalo chicken flavor, especially if you drizzle a good amount across the top.


Mozzarella may not be traditional but it does add a nice cheesy stringy bite to the loaf.  It'd also be fun to add a layer in the middle, but I didn't think of that until after the fact. 


Quinoa Turkey Loaf

Ingredients
1/3 cup uncooked quinoa
2/3 cup water or chicken broth
1.5 lbs ground chicken
1/4 cup oat bran or bread crumbs
1 tablespoon tomato paste
1/4 cup buffalo wing sauce
1 tsp freshly ground black pepper
1 egg
1/2 cup shredded italian cheese
additional buffalo wing sauce for drizzling over top

Directions
  1. Bring the quinoa and water to a boil in a saucepan over high heat. Reduce heat to medium, cover, and simmer until the quinoa is tender, and the water has been absorbed, about 15 to 20 minutes. Set aside to cool.
  2. Preheat an oven to 350 degrees grease loaf pan
  3. Add chicken, cooked quinoa, buffalo sauce, oat bran, egg, and pepper to a large bowl  and mix until well combined. The mixture will be very moist. Pour into prepared loaf pan
  4. Top with cheese
  5. Bake in the preheated oven until no longer pink in the center, about 35-50 minutes.  An 8 inch loaf pan took 40 minutes. (A thermometer inserted into the center should read at least 160 degrees F.
  6. Let the meatloaf cool for 10 minutes before removing to platter.  Drizzle with additional buffalo sauce.

Monday, March 26, 2012

Chocolate Malted Whopper Cookies


It seems each holiday has its candy fans and debates and Easter is no different. If anything, I think people tend to be more emphatic is voicing their Easter candy opinions.  You of course have your Peep fans, your Cadbury Creme egg fans, Cadbury egg fans and your Robin's Egg fans.  The only camp I've ever belonged to is the Robins Egg fans.  Peeps?  Not so much.  Cadbury Creme eggs?  My teeth actually hurt thinking about them.  Cadbury Eggs?  We had a guy at my last job who swore by them.  He would buy an entire year's supply and fill an enormous plastic tub.  I'm not a milk chocolate fan so that leaves Robin's eggs--a little bit of chocolate and tons of crispy crunchy malty goodness.  I bought the requisite bag for the Easter season and then needed to figure out something to do with the bag since it was sitting around after the first few bites.  Enter Dorie Greenspan's recipe for chocolate malted whopper cookies. 


Despite my shelves of cookbooks upon cookbooks upon cookbooks, I always go back to this baking cookbook by Dorie.  Not only has every recipe been phenomenal, but it's so exhaustive that I always find a recipe that I want to bake.  It's just easy one stop recipe shopping when you don't really want to go through many cookbooks but know you want to find that one recipe that needs to be made.


For some reason I always need to add an additional 1/2 cup flour because my cookies always spread so much and don't fully bake all the way through.  Just that additional flour helps make everything better. 

Overall these cookies are a tried and true favorite with their rich malty chocolate flavor.  They also freeze really well just in case cookies don't go all that quickly in your home. ;)


Chocolate Malted Whopper Cookies
adapted from Dorie Greenspan’s Baking…From My Home to Yours

1 3/4 c. all purpose flour ( I have to use 2 1/4 cups flour else mine always spread too much)
1 c malted milk powder or Ovaltine, regular or chocolate flavored (I used regular)
1/4 c. unsweetened cocoa powder
1 1/2 t. baking powder
1/2 t. salt
1 stick plus 3 tbsp butter at room temp
2/3 c granulated sugar
2 large eggs
2 tsp vanilla extract
1/4 c milk
1 1/2 c coarsely chopped Robins Eggs (or Whoppers)
1 c chocolate chips
  1. Preheat oven to 350 degrees F. 
  2. Line two cookie sheets with parchment or a Silpat mat. 
  3. Put your dry ingredients from flour to salt in a large mixing bowl and whisk together so there are no lumps. 
  4. In the bowl of a stand mixer fitted with a paddle attachment, beat butter and sugar on medium for a minute or two, until it is light and fluffy. 
  5. Add eggs and vanilla and mix together on low speed until incorporated.  Mixture may look curdled but this is okay
  6. Add 1/2 of dry ingredients to butter mixture and mix on low speed until just combined. 
  7. Add the milk and beat in. 
  8. Scrape sides of the bowl with a rubber spatula and add the rest of the dry ingredients to the bowl. Mix on low speed. 
  9. Add Robins Eggs, chocolate chips and stir together 
  10. Drop by rounded tablespoon onto prepared pans leaving a generous inch between cookies  
  11. Bake for 10-14 minutes.  Let cool for 2-3 minutes before removing to cooling rack

Saturday, March 24, 2012

Blackberry Crumb Muffiins


Lazy saturday morning before day of more unpacking and organizing ahead of me...I knew I had to get in the kitchen and bake something before I dug into any boxes.  I've been in this place for two whole weeks so one would think that I'd be unpacked but as it turns out, I prioritize shopping before unpacking.  With a whole new place to settle into there's always shopping to be done for new curtains, shelves for organizing the basement, small pieces of furniture.  That's obviously more exciting than unpacking. 

Choosing the first baking item was a no brainer...something with a brown sugar buttery crumble.  The muffin is really just the carrier vessel in my book.  I've always been a huge fan of the Starbucks crumb cake and ever since I tried the NY Time rhubarb crumb cake, I've been using that crumb making technique exclusively.  Love those big fat crumbs that hold together!

Blueberries are an obvious substitution if you don't have blackberries.  I so love that berry season is quickly coming upon us. 


Big fat crumbs = true love.


Blackberry Crumb Muffins
makes 12 muffins

Ingredients
1 c fresh blackberries, washed
2 c ap flour plus 1 tbsp for sprinkling on berries
¾ c granulated sugar
2 ½ tsp baking powder
½ teaspoon baking soda
½ teaspoon salt
1 cup buttermilk
4 tablespoon unsalted butter, melted and cooled slightly
1 tsp vanilla extract
1 large egg

Crumb Topping:
1/3 cup  granulated sugar
1/2 cup brown sugar
2 tsp ground cinnamon
1/2 tsp ground ginger
1/4 tsp salt
1 stick butter, melted
1 1/2 cups  flour

Directions 
  1. Preheat oven to 375 degrees and line muffin tins with liners
  2. Prepare crumb topping: in a large bowl, whisk sugars, spices and salt into melted butter until smooth. Add flour and stir. Set aside while you prepare muffin batter
  3. Whisk the flour, sugar, baking powder, baking soda, and salt into a large bowl to remove any lumps.
  4. In a separate bowl, whisk together the buttermilk, vanilla, butter, and egg
  5. Stir the buttermilk mixture into the flour mixture with a fork, mixing just until blended 
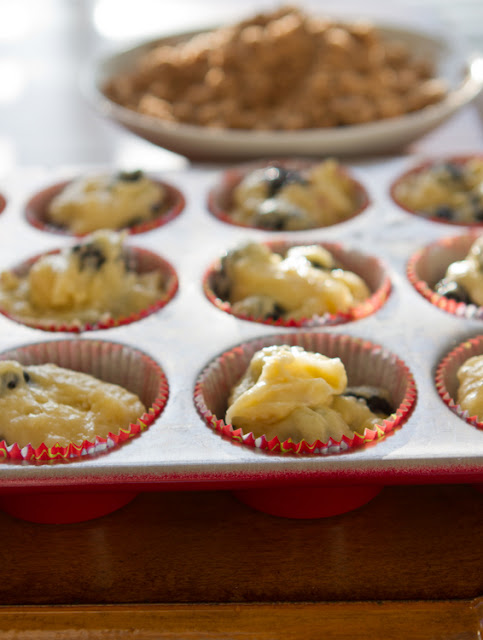
  6. Sprinkle blackberries with 1 tbsp flour and toss.  Fold the blackberries gently into the batter 
  7. With a standard ice-cream scoop the batter into the prepared cups, filling them almost full
  8. Using your fingers, break topping mixture into big crumbs and sprinkle over muffins
  9. Bake for 18-22 minutes or until toothpick inserted in center comes out clean

Thursday, March 22, 2012

The Long Road Home...


seems even longer if you decide to move yourself. Is the better question here "Can my life really be packed up into a 16 foot truck" or "does my life really require an entire 16 foot truck?"  I was leaning toward the 2nd question as the movers got all of my crap things packed tightly into the truck.  Truthfully I was a little embarrassed and wondered if I might need intervention from the Hoarders production staff. 

While moving myself via a big truck was not my first plan, my brothers offered to come out to Vegas and drive me back...and then my mom offered and before I knew it, we had a little road trip caravan planned.  It wasn't too bad split over two days and were able to spend a bit of time in Zion National Park along the way. 

Just a little side note here that my awesome brothers drove this beast 800+ miles without incident.  I drove it less than 3 to return it and took out the left side by driving onto the top of the gas station concrete barriers that protect the pump.  Yep, it was a sight to behold (and snicker at). 


Before we left Vegas, a few touristy things with the family....


 From the top of the dam.


Then, from the top of the bridge 


A gantt chart immortalized in bronze.  


And Zion.  I have to say that it might just be the most beautiful National Park I've ever been too.  Since I'm saving most of the photos for a Lightroom class I'm taking, these are minimally edited--the sky really was that blue--photoshopped by God.


You can hike up the river canyons here...I wish we'd had time.


And Utah during sunrise.  Love sunrise. 


Sunday, March 4, 2012

Nelson, Nevada


Nelson is a little ghost town just a short drive outside of Vegas.  I've been meaning to head out there to play with my camera for awhile and of course, like most things in life, haven't gotten around to it.  Moving however, gets these types of goals fast tracked.

Truth be told, I was not prepared for the sheer quantity of old cars, buildings and gas stations. I thought there might be a handful but we spent about an hour and half there and didn't hit half of the cool things to photograph.  There was even plane wreckage on site.  A collection of gritty photographic gems like this make this a photographic paradise, so needless to say, we were hardly the only ones there.  For just $10 an hour, you can photograph to your hearts content, and there were about a dozen other photographers taking advantage of this phenomenal site as well.  Even with that many other groups, there was enough space and sites that rarely had anyone in the backdrop of our photo nor did we have to wait to take a photo.
Take photos in a ghost town...check. I'm a little sad that I didn't go to Nelson this earlier...I am kind of itching to head back and try again.  And if you go, you'll come across the small town of Nelson first full of "no trespassing" signs.  Keep going past this town through a windy little canyon.  The ghost town is just on the other side.